I’ve always included crazy outdoor activities to add spice to my life. These adventures include puenting, canyoning and sleeping in jungle huts in Ecuador. There’s so much to experience off the beaten path. You just need to take that chance to try something different than what you do in your day-to-day life. Sometimes, activities are further away from home: like driving on the road to Hana (on the sketchy part) in Maui or sitting on the edge of your seat in an open-door helicopter ride, like we did on our honeymoon. Recently, I added the Via Ferrata in Norquay to my list, which happens to only be four and a half hours away from where I live! Opportunities can often be found close to where you live too; you need to embrace what your area has to offer.
Table of Contents
Via Ferrata at Mount Norquay in Banff
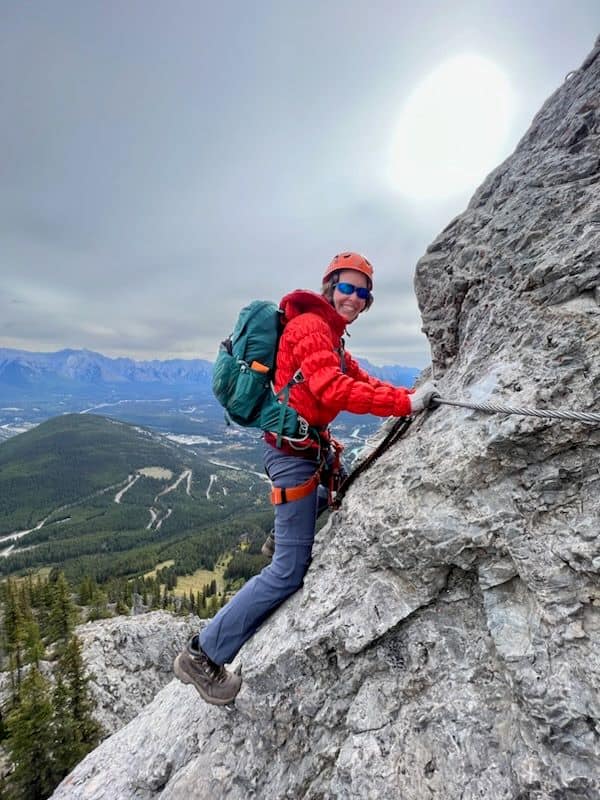
Picture courtesy of Ashley from Exploring Our Way.
Although I was skeptical at first about enjoying the Via Ferrata at Mount Norquay in Banff, it turns out that it was a blast! It must be included in your crazy outdoor activities list! The Via Ferrata includes two guides directing you on the different routes available. Both guides were so helpful in recommending the next foothold or rung to grab. It was immensely helpful to have them with us. They were amazing and helped boost my confidence. Some routes, in my opinion, are scarier than others with ladders as part of the course. We did the Ridgewalker (no ladders) and although scary in one section, it was completely doable. You’ll be required to wear a helmet, and a harness and clip yourself onto the cables with carabiners. A safety briefing will provide a practice run to get used to all the equipment before starting the route.
Tip: Ensure you have footwear with ankle support such as hiking boots when attempting this activity. If you don’t, no worries but they will ask you to rent boots to provide you with the proper ankle support.
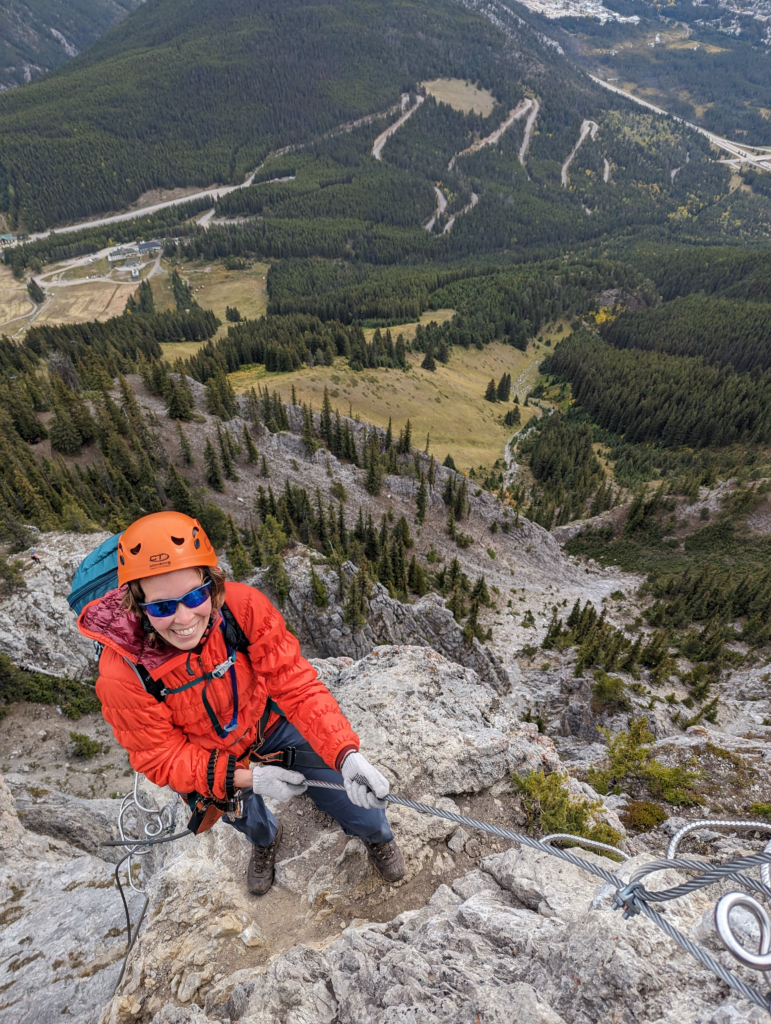
Picture courtesy of Caz from Y Travel.
Pushing Our Limits
Although not a cheap expense at $240 CAD for three and a half to four hours round trip, it’s an unforgettable experience! As we gained altitude, it provided spectacular views from the top! I had never done something like this before but I’m glad I tried it. It pushed me out of my comfort zone and I can only imagine I’ll end up here again for a couple’s activity since my husband was very envious that I did it without him! The awesome part is that many routes are available depending on your comfort zone. You’ll have the opportunity to try a reasonable route and work your way up if you’re interested in trying a harder route.
Tip #1: Take breathers every once in a while and enjoy the view (when it’s safe to do so).
Tip #2: Brace yourself before looking down to take pictures and ensure you have steady feet when someone takes your picture.
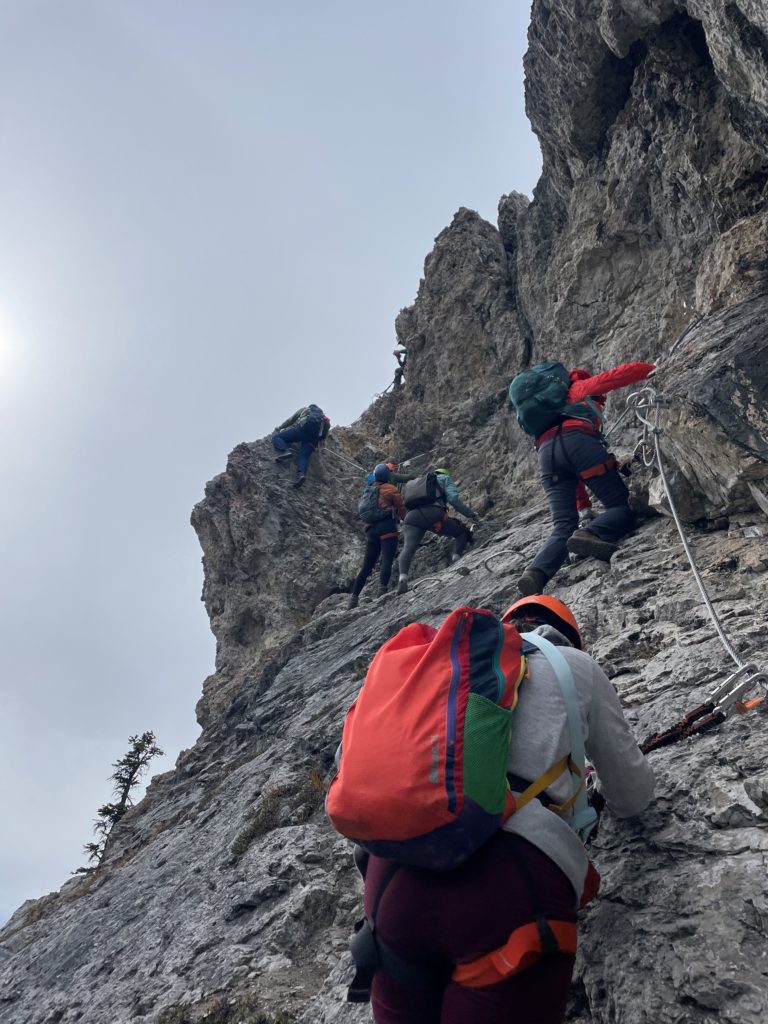
Picture courtesy of Krista from Our Wild Wanderers.
Steep Climb
This was part of the steep section going up. As you can see we had multiple people (seventeen in our case) in a line moving slowly forward up the mountain. With many ladies in a row, it encouraged us to keep going and not stop. With just Kris and I, I could have seen myself freezing and trying to convince myself not to go forward but in the middle of the pack, I had no choice but to move forward. That was best for me to avoid overthinking. After accomplishing the route, it made me realize that I was quite capable and that overthinking was worse than actually doing it! I believe in YOU, you can totally do this!
Tip: It’s important to note that not everywhere on the mountain is a good place to stop. When you’re in a group, look around to see where the next person above you is situated. Choose your breaks along the mountain accordingly. Avoid looking down if it makes you panic. Keep in mind that you have no choice but to keep moving. To avoid freaking out and freezing stuck on the mountain, don’t stop in tricky spots!
Successfully Completing the Hard Section
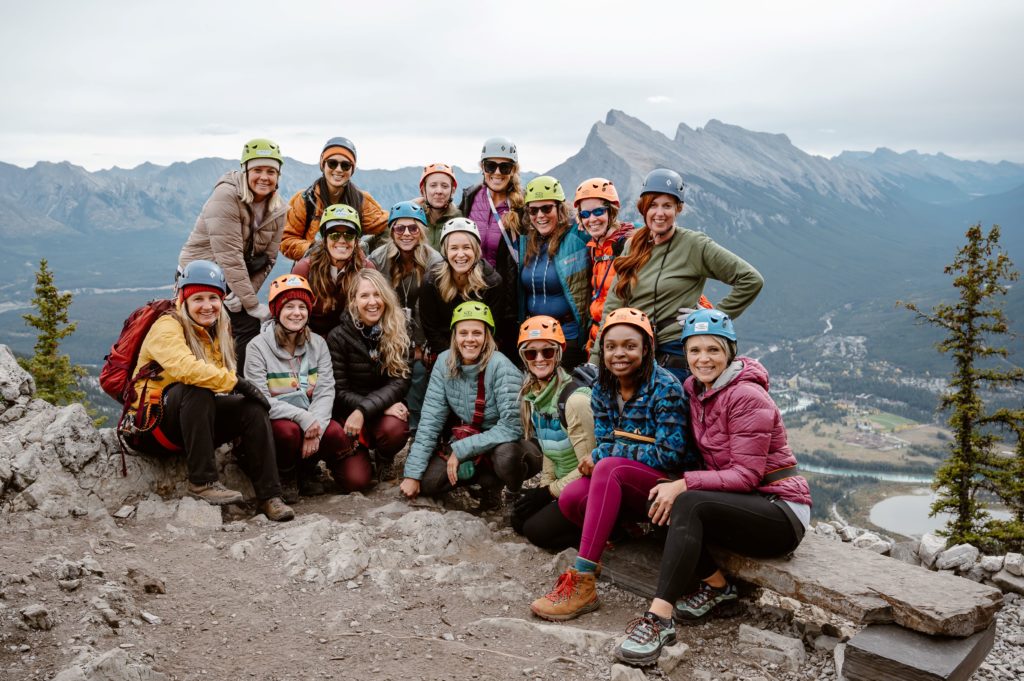
Our group: Alyssa, Caroline, Christina, Krista, Jen, Lori, Katie, Nichole, myself, Kristen, Laurence, Ashley, Arika, Caz, Elisa, India, Gina.
Picture courtesy of Gina from Driftwood Photography.
After the huge accomplishment, it was important to document our success! Thankfully, the route is a loop. The first part to this point was slightly difficult with climbing up on the side of the rock but after this point, it got easier with a hike back down to the starting point. You’re still harnessed in for safety precautions on the descent but it’s much easier like gorgeous hiking to Laughing Falls. It’s especially nice not to have to go down rungs! Going upward on rungs is a lot easier than attempting them downward. Just keep moving upward on the tricky section and you’ll do great!
Ecuador
Back in 2008, I had the opportunity to join a group called International Student Volunteers for six weeks in Ecuador. During one week, we took Spanish classes and toured Quito to learn Spanish words at the grocery store and we also took salsa classes. Weeks two and three were spent volunteering at Bombolí, an eco-friendly farm. Weeks four and five included crazy outdoor activities on the mainland followed by one week in the Galapagos. Described below are the adventures I experienced.
Puenting
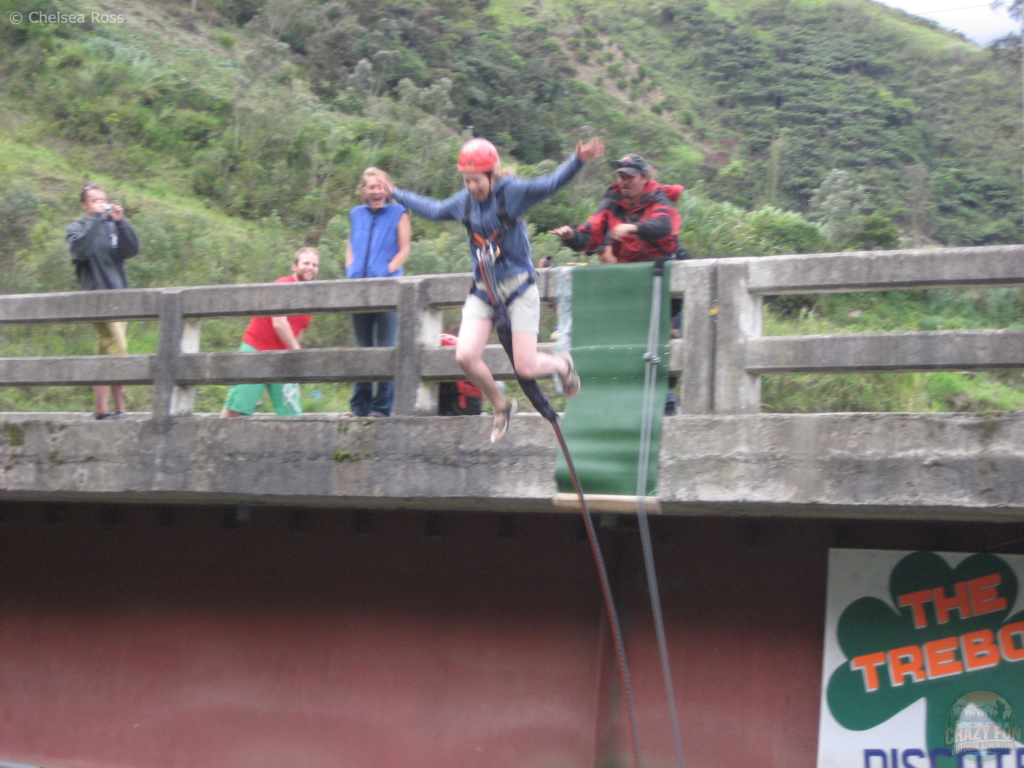
We experienced puenting, kind of like bungee jumping but instead of the harness being attached to your feet and bouncing up and down, it’s tied to your upper body for a pendulum swing. It took lots of encouragement to do this one, but my buddy Scott encouraged me to do it. Many people at home didn’t think I’d do it but I proved them wrong and voilà success!
This activity was terrifying. Standing on the side of the bridge and looking down at rocks that were really not that far away and hoping that I did swing and the cord wouldn’t snap were thoughts going through my mind! But, it’s like life right, you can come up with one million reasons why something won’t work out or just trust that everything will work out and take the risk and jump! As it turned out, I was successful! That was really the thrill of a lifetime! Although, yes it’s crazy; it was a crazy fun outdoor adventure that not many people do or can brag about. I’m happy that I was part of the group that attempted it! Would you ever attempt to go puenting?
Canyoning
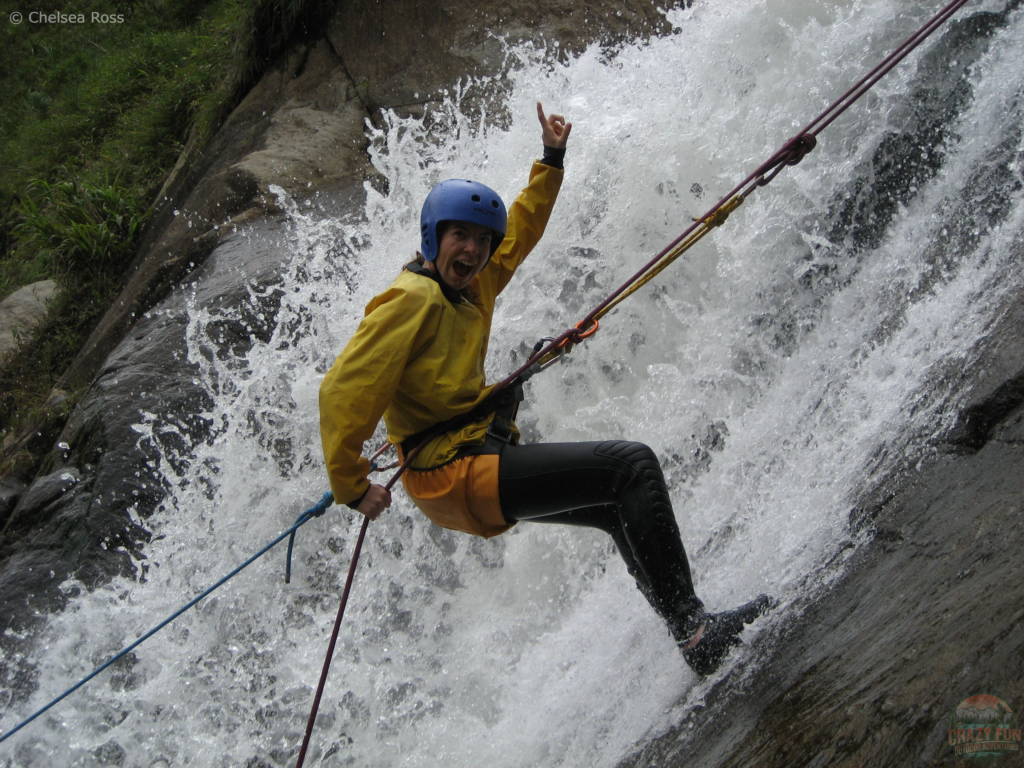
Canyoning was awesome! We were outfitted with a wetsuit, waterproof jacket, water shoes, and a helmet. We had three different sections to do with the last part being the longest at 150 feet long. The first two waterfalls were smaller and we had to rappel down the waterfall by bracing ourselves on the rock. That was super fun. It felt safe being attached by three different ropes. The last section was scarier and more challenging because we had to drop beside the waterfall and there wasn’t anything to brace ourselves against. We started to rappel slowly but once we started focusing on gradually descending, it was fun to be hanging up so high, in the middle of Ecuador no less, feeling as free as birds. I would highly recommend this activity. It was a really neat experience.
Sleeping in the Jungle
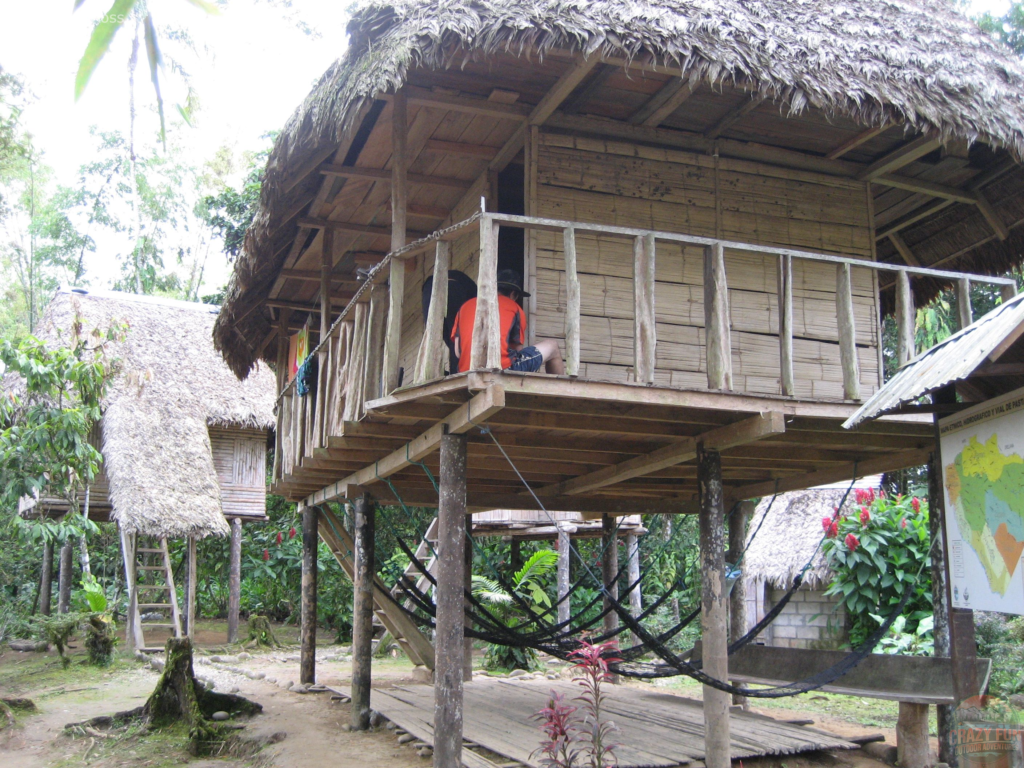
One of our crazy outdoor activities included sleeping in the jungle. This experience was so cool! Have you ever considered including sleeping in the jungle as an adventure? The amazing thing about sleeping in a jungle is that you’ll have the opportunity to see so many different birds and monkeys during the day, just hanging out in the forest around you. These huts, as shown, were basic but provided an adequate place to sleep. If you need a spot to chill and unwind, hammocks are located below the huts for some relaxing time.
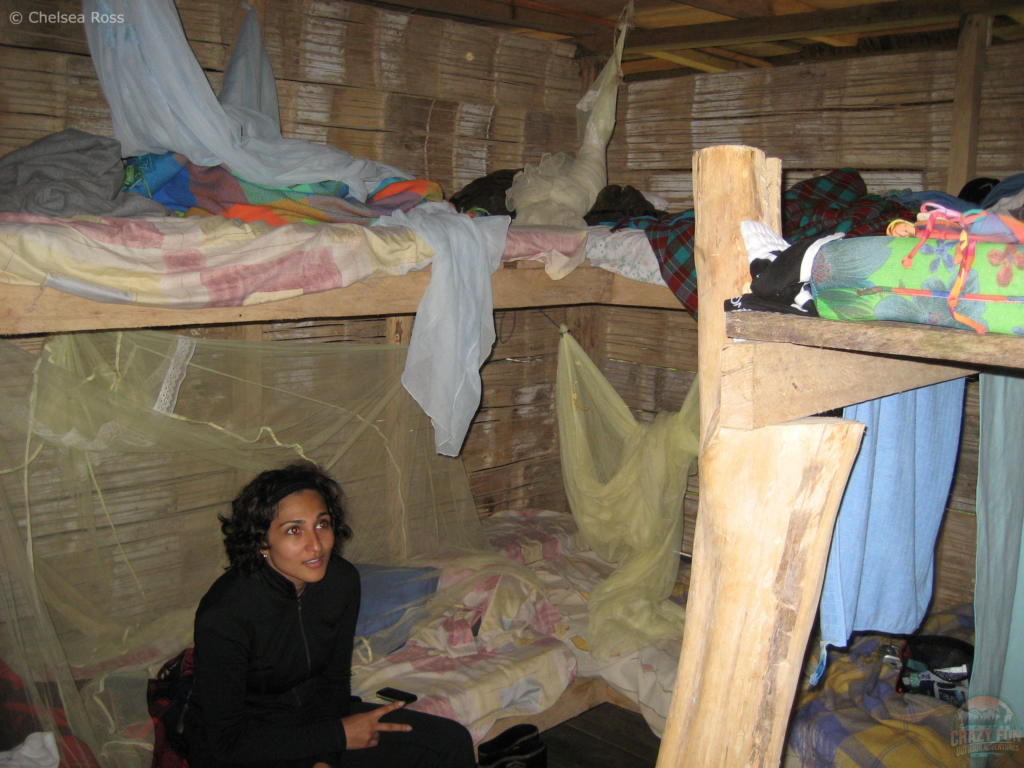
Sleeping Under Mesh Netting
We were strongly encouraged to sleep under the mesh provided to avoid bugs crawling on us in the middle of the night. Many of our group woke up to critters walking on the mesh when they woke up! It was best to have them on the netting instead of on ourselves! If you’re looking for an authentic experience, this is it! They provided flush toilets in a hut close to the sleeping huts. All meals were provided for us, including many locally grown fruits at breakfast that offered a burst of flavour to start the day.
Local Traditions
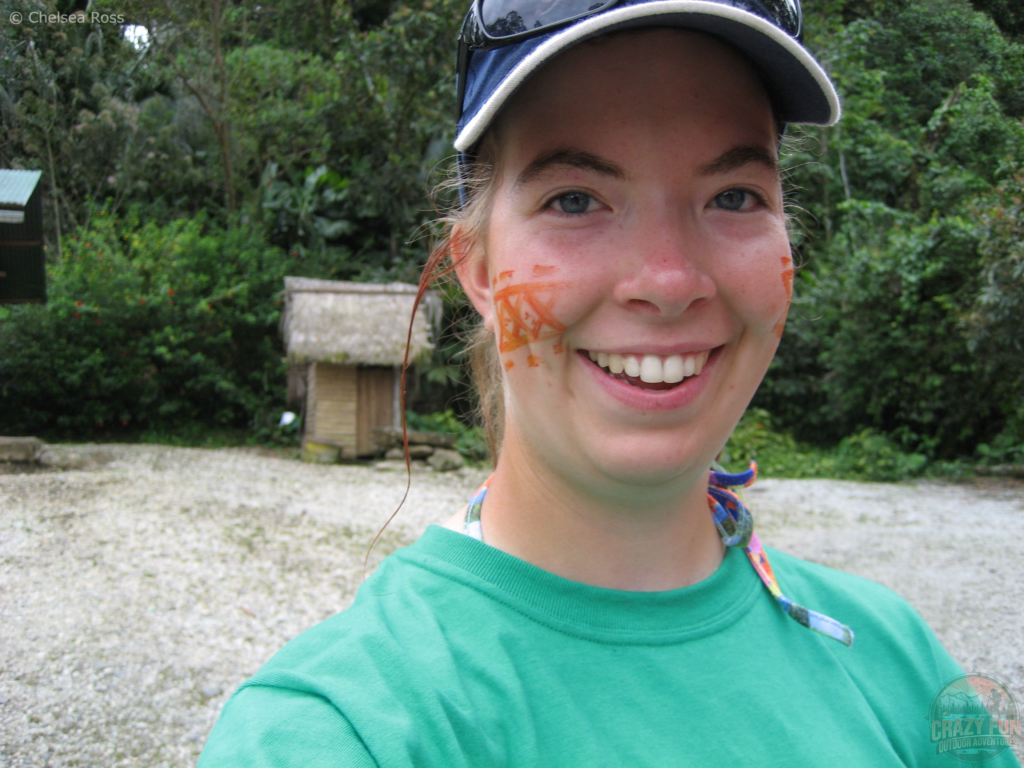
Our guides took us on a muddy hike in the jungle to give us the opportunity to see different animals and plants. We covered ourselves in mud to rejuvenate our skin and experienced the local tradition of cutting open seeds from the achiote tree containing natural paint to create designs on our faces.
Bonus Activity
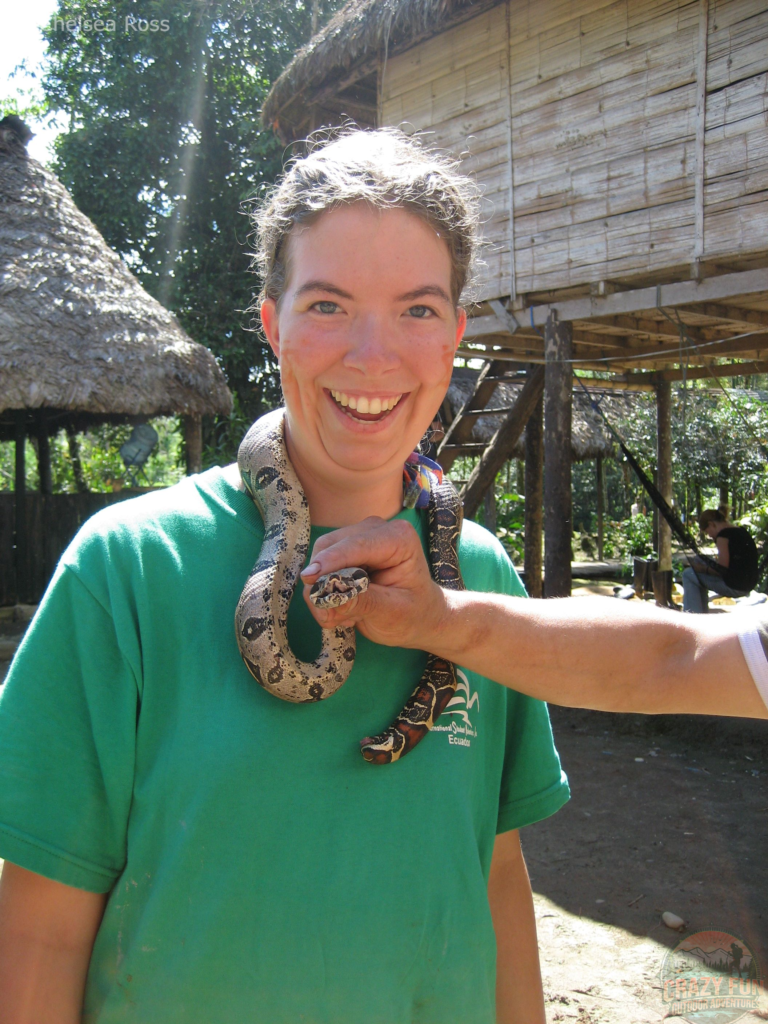
We were given the opportunity back at the huts to place a snake around our neck to add to our crazy outdoor activities! Even though I very much dislike snakes, I developed the courage to put one around my neck! It wasn’t so bad…for about a minute. The smooth feeling of the snake was weird on me so I didn’t last very long but I was happy I got a chance to try anyway. No time like the present to get over my fear. It helped very much to accomplish this activity with the snake being supervised by our guide!
Parasailing in Punta Cana
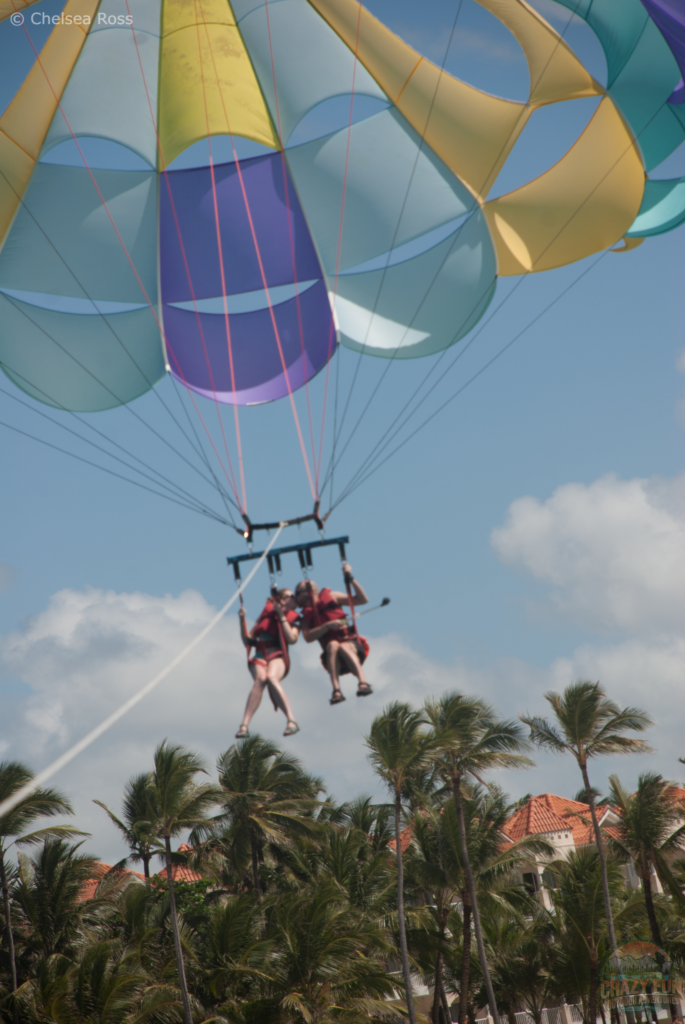
We went parasailing in Punta Cana, Dominican Republic after seeing people do the same near the Majestic Mirage resort where we were staying. If you’re interested in more adventures, here are the Top 10 Activities from Majestic Resorts. We embarked upon a boat that took us away from shore to the boat that was connected to the parasail. On that particular day, the ocean was extremely wavy. When you go, there might be many other couples waiting for their turn. You might be required to wait in the boat a while before it’s your turn.
Tip: If you’re prone to sea sickness, I encourage you to take motion sickness medication before embarking on the boat to prevent getting sick.
Birds Eye View
Once it’s your turn, you’ll get harnessed and slowly released up into the air until you can see all around you. It’s really a cool and freeing experience. When my grandma was ninety years old, she wanted to go parasailing. She tried but unfortunately, the conditions weren’t the best, so she wasn’t able to go. When I discovered this possibility, I thought of my grandma and thought if she wanted to do it at ninety, I could certainly do it at thirty years old. I dedicated our adventure to her.
Go-Pro
Parasailing is a great couple’s activity. Kris and I took pictures of each other and our surroundings with his Go-Pro.
Tip: If you take your Go-Pro, make sure to loop the string around your hand and tightly hold on to the extended arm to not lose it in mid-air.
Company
This parasailing company costs $105.41 CAD for fifteen minutes. Although a short experience, I thought it was well worth it, and I didn’t regret it. It’s super simple, doesn’t require much effort, and you get to experience a new adventure.
Hawaii
Kris and I went to Hawaii in July 2023 for our honeymoon. We wanted to add some crazy outdoor activities to our list. Below are the adventures we found.
Surfing
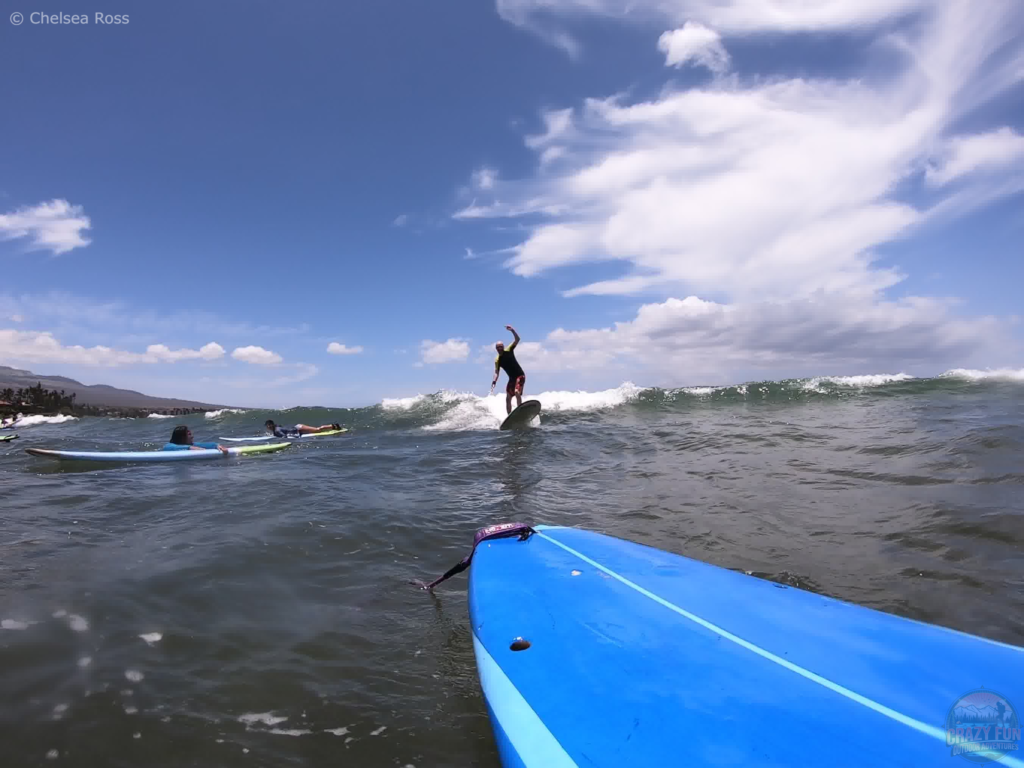
Kris really wanted to go surfing during our visit to Maui. While walking along the beach, we found a company called Maui Waveriders with Surf School and Rentals written on the outside of their building. We decided to try it and the ambiance was so welcoming we went another two times while we were there on our trip. They either rent surfboards and a class combo or you can rent the board and go surfing on your own. Since we have previous surfing experience, we chose to surf on our own. This company has different prices available depending on what you’re looking for.
Tip: Go earlier in the morning (8 or 9 a.m.) to have access to multiple boards from which to pick. In addition, the waves are best in the morning. If you go around lunchtime, the waves tend to die down.
Successful Surfing
Kris and I successfully got up on our respective boards! Although we didn’t get a picture of me on the board, I’m happy I was able to capture a picture of Kris! If you think about it, this activity is kind of crazy since you’re trying to get up, balance on a moving board and then keep going without falling off. It turns out, it’s a bit trickier than it might seem. It’s a great couple’s activity. Encourage each other when you’re doing well and pick each other up after you fall (it’s inevitable that you will fall). Take turns getting up on the board and taking pictures of each other.
Tip: The Go-Pro tends to get in the way when trying to paddle, holding the board and getting up. We only brought it with us for one day. Otherwise, it really limits how much you can surf. For this one shot of Kris, it was awesome to have it!
Road to Hana (Sketchy Part)
The road to Hana is known for its winding roads and many one-lane bridges. It has several gorgeous stops along the way. Many tourists explore this region making it busy and a long day with lots of traffic. From Kahului to Hana and vice versa the road is slow but manageable and totally worth exploring!
South of Hana, there’s a particularly sketchy part of the road that advises tourists to be extremely cautious if they decide to attempt it. Vehicle rental companies typically recommend against driving this part of the road.
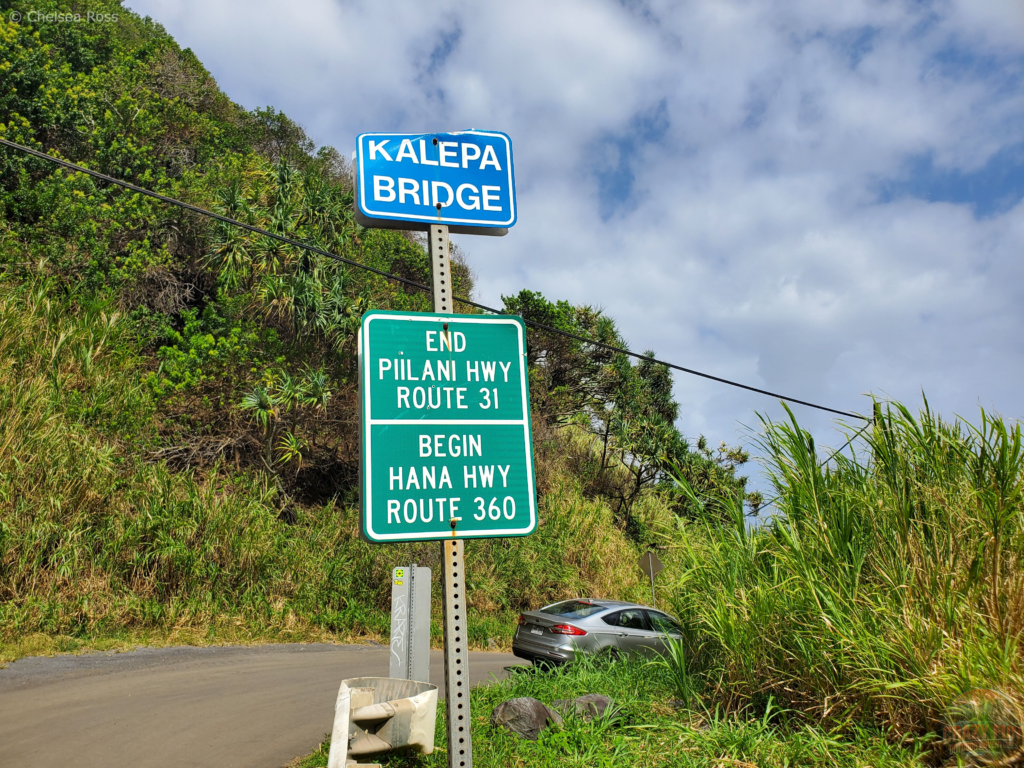
This sign on the Kalepa bridge indicates the end of the Pilani Highway and the beginning of the Hana Highway meaning that the sketchy part of the road is just ahead. We were headed from south to north on this road when we saw this sign.
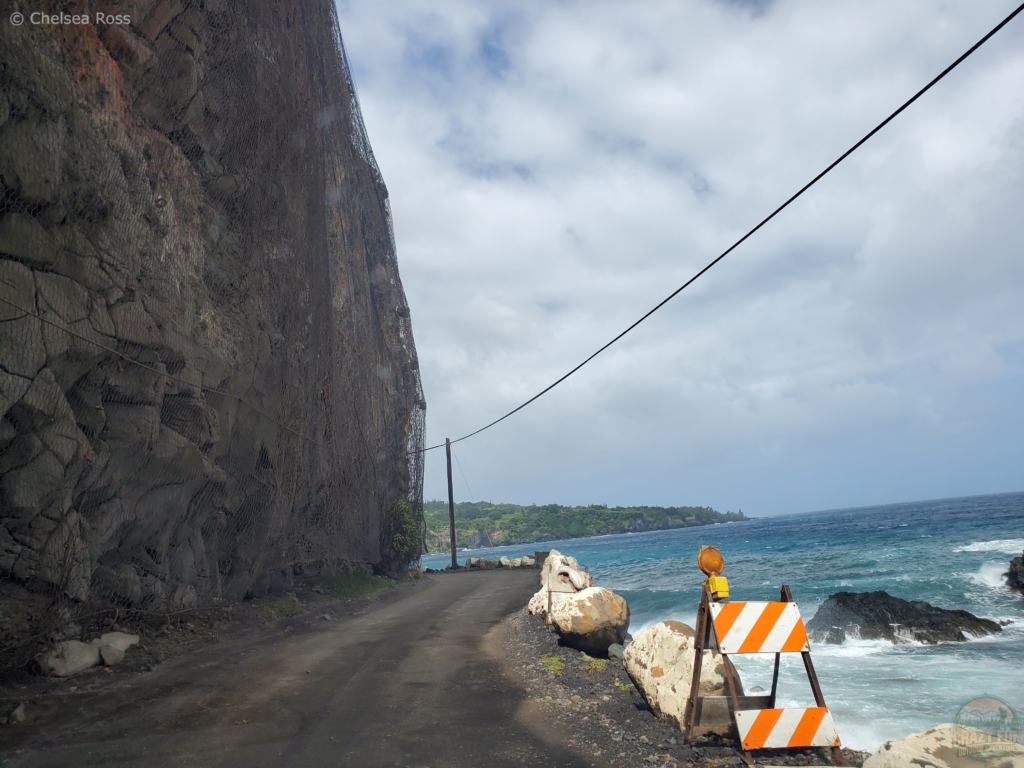
At this point, Kris and I have started the sketchy part of the road. As you can see there is a rock mesh on the left-hand side to hopefully prevent rocks from falling on vehicles. The ocean is to your right with no guard railings. The road is very narrow and like this for the ten-minute (it felt longer) duration of the sketchy drive along the ocean. There is no room to move to the side of the road when meeting oncoming traffic. When encountering another vehicle, backing up would be required on the narrow winding road until it’s safe to pass each other.
Tip #1: Honk your horn for the entirety of this road to inform oncoming traffic that you are coming, as we did.
Crazy Experiences
This is the last picture I took on this road since I was feeling nervous, not knowing what to expect. Even though I admit, this was kind of crazy, adding it to my crazy outdoor activities turned out to be kind of cool. By taking proper precautions and having back road experience, it’s possible to safely make it across if you want to try it yourself. There are blind corners, so honk when you can’t see around a corner. Get a high clearance vehicle like a RAV4 so that you feel a bit higher up to enable you to see your surroundings a bit better than in a car.
The Alelele Bridge marks approximately the halfway point of the sketchy part of the road. Once you reach that part, know that it’s almost over and you’ll be back to an inland road shortly.
Tip #2: Beware that this road is strictly at your own risk. If you end up with a flat, sometimes it’s hard to get reception and a tow won’t typically come out and help you. Be ready to deal with whatever happens on your own. When the road is slippery and wet during the rainy season, I strongly discourage you from driving this part of the road.
Open-Door Helicopter Tour
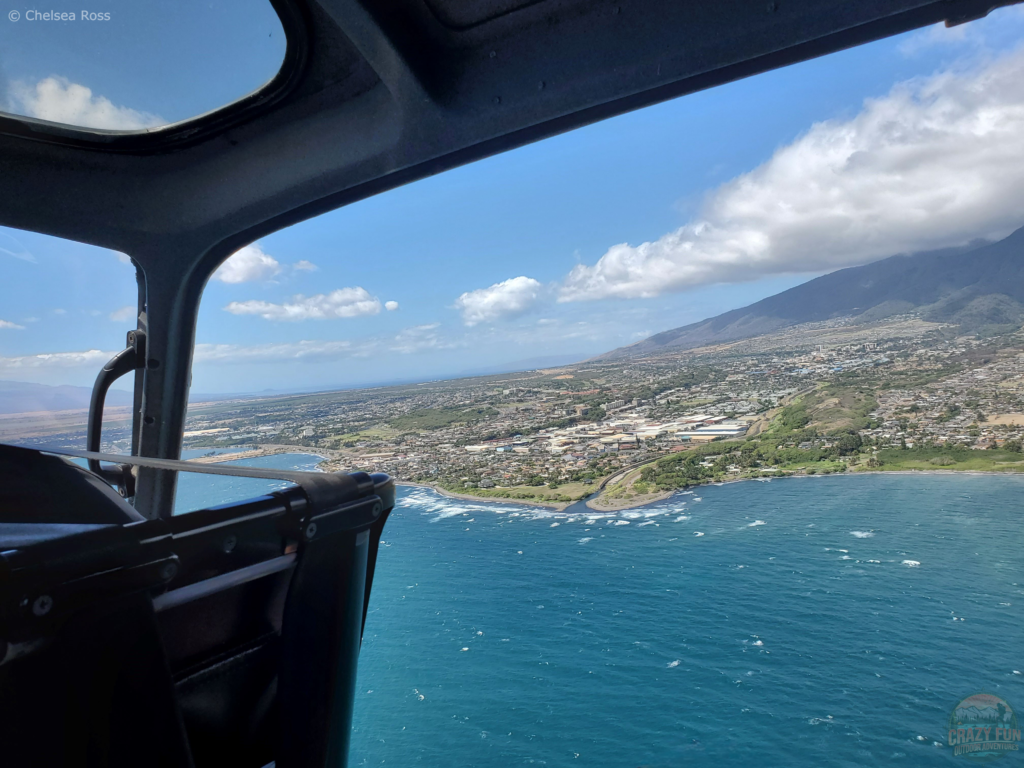
Our crazy outdoor activities included an open-door helicopter tour for forty-five minutes with Air Maui. This was crazy since we had no doors! I was sitting further inside the helicopter but for Kris who was right on the edge, it definitely made him skip a beat looking down! We had seatbelts but without the doors, it definitely felt like we were out in the open. Thankfully our phones were placed in a lanyard (Air Maui policy) to avoid it falling out of the helicopter.
We were able to capture some gorgeous pictures despite some challenges. I had two ladies sitting to my right. I often had their knees in my pictures. After paying $900 CAD for the two of us, I was annoyed that I wasn’t able to capture perfect pictures.
Tip #1: If you go with the open-door helicopter tour, ask to sit on the edge to get flawless photos or go with a different company so you can both sit on either side to capture those perfect shots. Chances are though, if you’re going just the two of you instead of a group of five people as was our situation, you’ll either need to go for a shorter ride to afford it or pay more money for forty-five minutes to cover the cost with fewer people in the helicopter.
While Kris sat on the edge, he was forced into the helicopter by the wind, making it harder to take pictures and feel comfortable. There are advantages and disadvantages depending on where you sit.
Take Anti-Nausea Medication
Tip #2: Take anti-nausea pills to avoid feeling nauseous.
The trip was great and we got some fantastic pictures but unfortunately, even with both of us taking Gravol pills, we were both feeling a bit unwell after twenty minutes. Going for a helicopter ride is definitely a different feeling than flying in a plane. Our helicopter pilot constantly redirected the helicopter from side to side so we could all take pictures but that increased the uneasy feelings. It was awesome to get spectacular shots from the sky but twenty minutes would have been sufficient for us. I definitely recommend this adventure and I hope these tips will help create the perfect tour to help you prepare.
Final Thoughts
Whether it’s the Via Ferrata, puenting, sleeping in a jungle hut, getting familiar with local wildlife, canyoning, driving a sketchy road, riding up in a helicopter, parasailing or surfing, crazy outdoor activities can be fun!
These crazy outdoor activities forced me to get out of my comfort zone and create experiences of a lifetime! Even though sometimes it feels uncomfortable and nerve-wracking, you just need to push yourself to get out there and try new things. If Kris and I wouldn’t have encouraged each other to do the road to Hana, we would have missed out on a gorgeous road trip! Yes, it was sketchy for ten minutes but we used tips from the locals to honk our horn around blind corners and keep an eye on the road and our surroundings and it was a wonderful success!
Feeling unwell for part of the helicopter ride wasn’t the best experience but we did get to take pictures above lush trees and greenery down below and later in our trip, we hiked in this area. That was cool to see two different views of one amazing place. There will always be excuses that will come up but will you listen to them or follow your heart for adventure and go have fun?
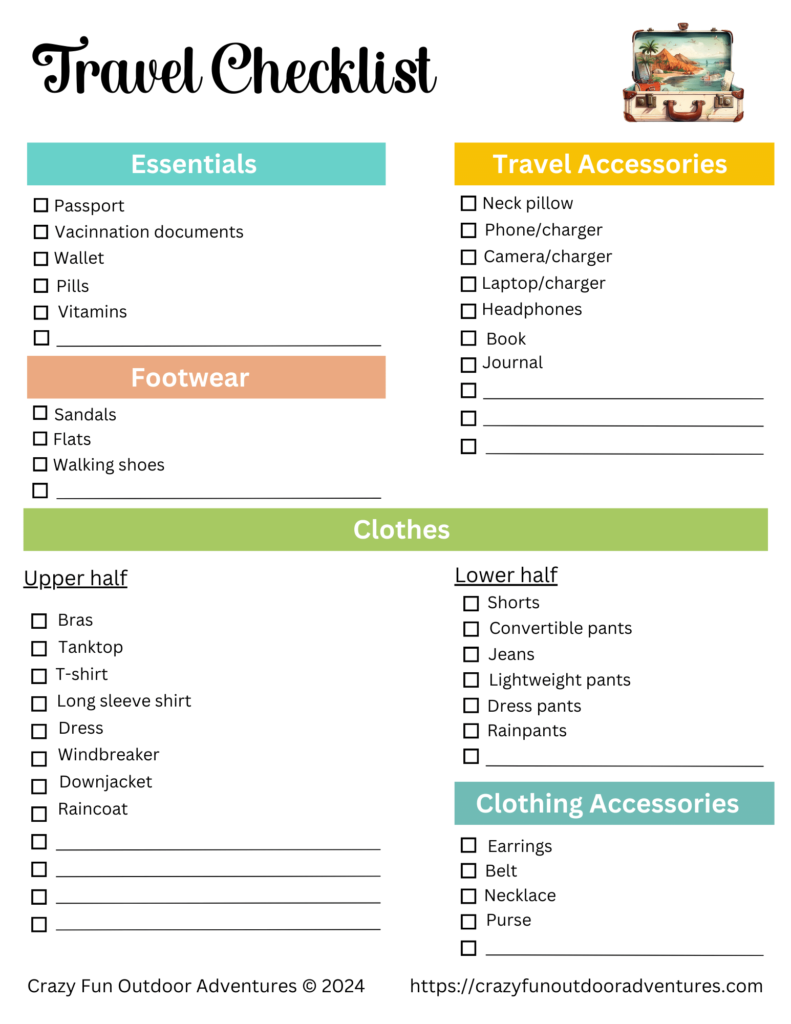
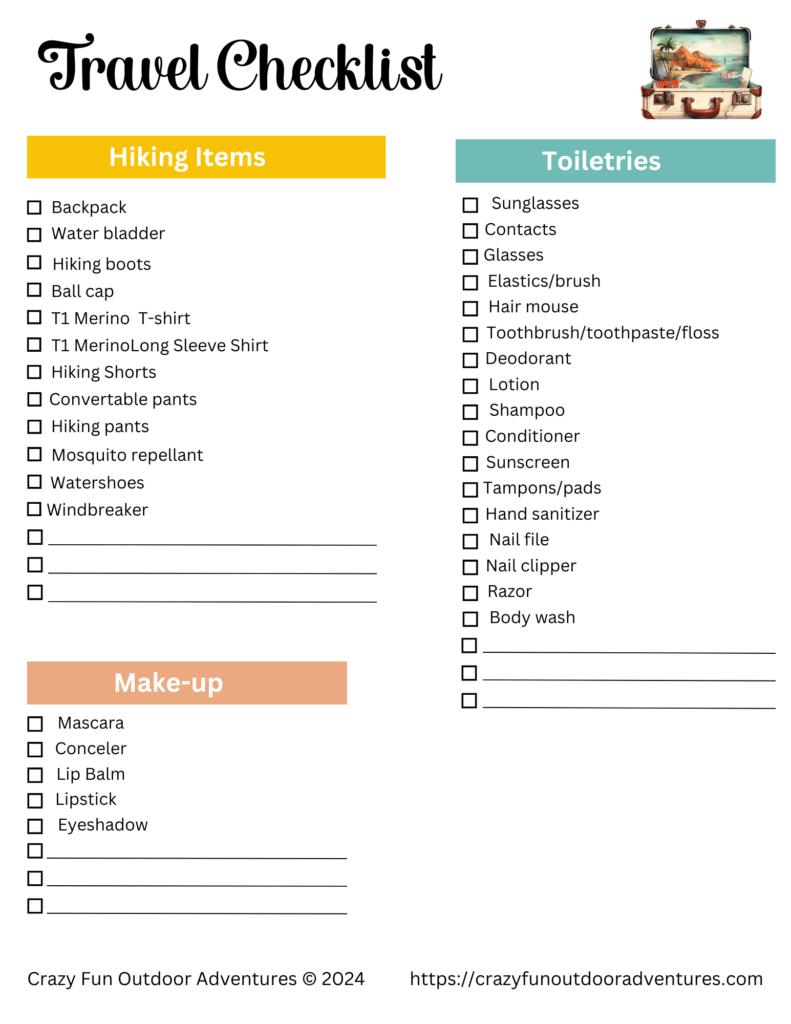
Here’s the link to download the travel checklist.
Check out the Printables Workshop or the Seasonal Products Secrets E-book to make printables.
Additional Links
- Unexpected Hike to Nocelle: Wonderful Outcome
- Focus on What Matters in Life
- Sporty Majestic Resort Kayaking
- Ultimate WCT Packing List
- Mount Batur Sunrise Hiking Guide
This post may contain affiliate links. If you purchase through my links, I might receive a small commission, at no additional cost to you. I only recommend companies and products that I’ve used and tested myself. If you’d like to support me, I’d greatly appreciate it! It will help pay for the costs to run my website.
Leave a Reply