This post contains some affiliate links. As an Amazon Associate, if you purchase through my links, I earn from qualifying purchases. I might receive a small commission, at no additional cost to you. Thanks for your support!

The wait is finally over to hike Mt. Robson’s Berg Lake Trail! It’s one of Canada’s most iconic backcountry routes, and it has reopened, better than ever! Tucked beneath the towering face of Mt. Robson, this trail is famous for its glacier-fed lake, rugged peaks, and once-in-a-lifetime views. After several years of closures and repairs, 2025 brings exciting updates and a few changes you’ll want to know before hitting the trail. From permits and campsite tips to must-pack gear, here’s everything you need to plan your best Berg Lake adventure yet.
Table of Contents
Trail Overview
- Location: The Berg Lake Trail is located in Mt. Robson Provincial Park, British Columbia.
- Distance: 23 km (14 miles) one-way on the old trail vs 24 km (14.91 miles) on the rerouted trail.
- Difficulty: The trail is considered challenging due to its length, which can be completed in 2 to 4 days.
- Elevation gain: 800 metres (2,600 feet)
- Updates: Flooding caused washed-out bridges and submerged campsites back in 2021. The trail reopened in 2025 after 4 years of reconstruction.
Why Hike Berg Lake
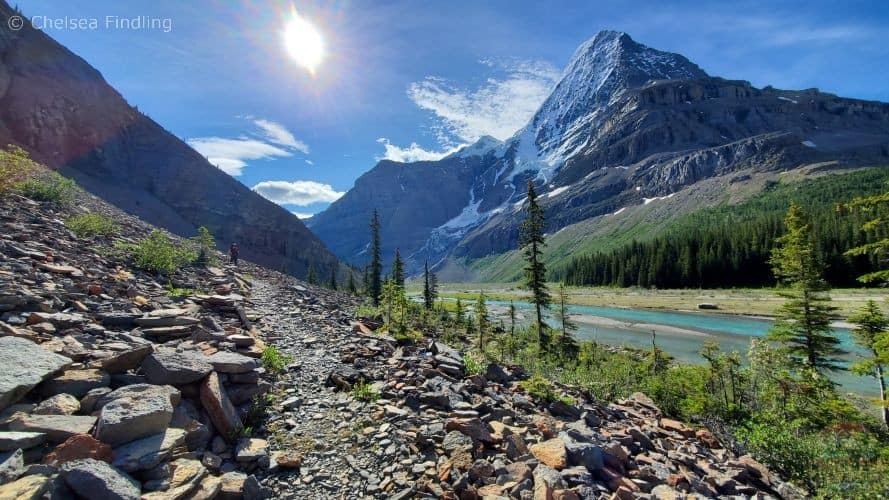
If you’re looking for a hike that feels like stepping into another world, the Berg Lake Trail should be at the top of your list. Nestled in the world-renowned Mt. Robson Provincial Park, this iconic backcountry trail delivers some of the most jaw-dropping scenery in the Canadian Rockies – towering peaks, turquoise lakes, cascading waterfalls, and the awe-inspiring Berg Glacier itself. It’s not just a hike; it’s an unforgettable multi-day adventure where every turn reveals a new postcard view. Whether you crave solitude, epic photography or the ultimate bucket-list challenge, Berg Lake offers it all, making it one of the most sought-after hiking experiences in Canada.
Camping Tips + Permit Process
Reservations for Mt. Robson’s Berg Lake Trail open on a single day each year for the entire season. This year, BC Parks announced that bookings would start on April 2, 2025, at 7 A.M. Pacific Time. Within about thirty minutes, most campsites for the whole summer were fully reserved.
Tip: To help ensure your booking is successful on https://camping.bcparks.ca/, sign in to your account before the queue opens to prevent any delays.
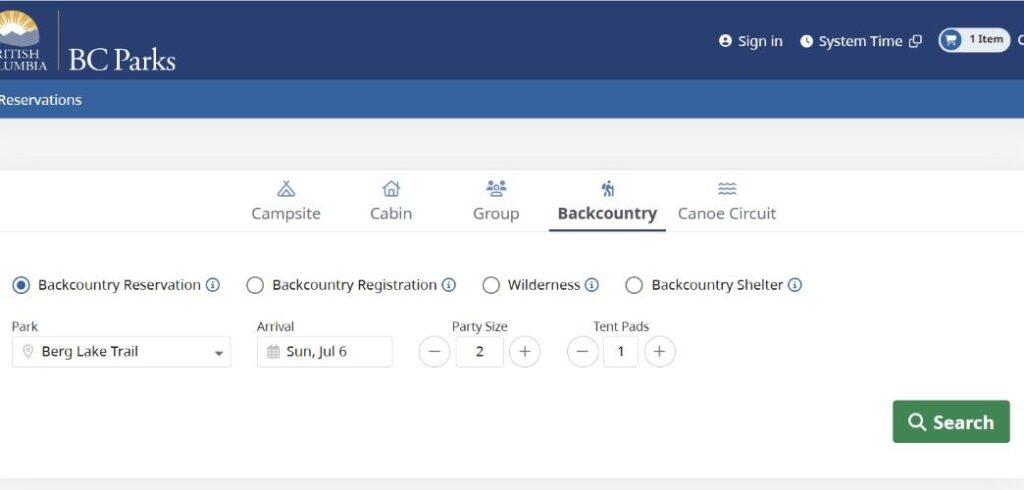
When you can start the booking process, select Backcountry, then Backcountry Reservation. Select the Berg Lake Trail, your arrival date, party size, and the number of tent pads required and click search.
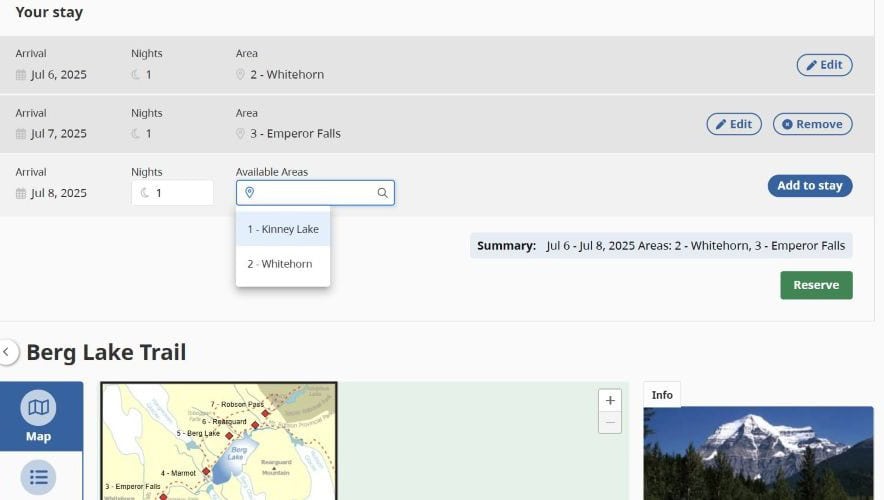
The following drop-down page will show up.
Tip: Enter your preferred campsite for each night of your trip. On the map, as the campsites fill up, the diamonds will turn from green (available colour) to red (full campsites), helping you determine where you should stay for the night.
After selecting and clicking “reserve,” enter your personal and credit card information. You will then receive a confirmation message at the top of your webpage indicating that your site reservation has been successful.
2025 Trail Reopening Info + Updated Route
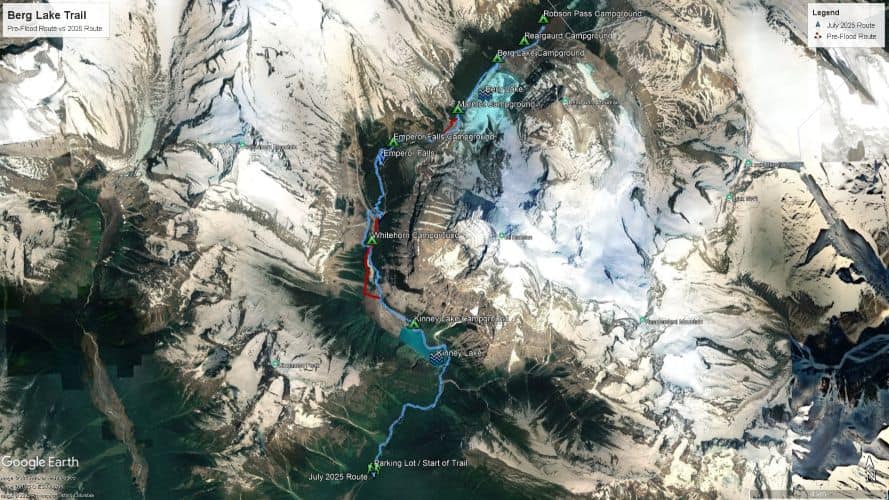
The trail has been rerouted at several locations where bridges were destroyed by the flood or the trail was washed away by landslides. The trail is now 24 kilometres long one-way, compared to its initial length of 23 km. The red shows the old trail while the blue shows the new trail. The diamond kilometre signs seen throughout the trail are for the old trail and are no longer accurate. The new signs, located on the posts in the middle of the trail, are the recommended trail markers to follow.
You’ll be required to pick up a pass at the visitor center to put on your tent each night, indicating that you’ve purchased a campsite for the night. They also walk you through a safety briefing covering what to expect on the Mt. Robson Berg Lake trail, dos and don’ts, and possible wildlife encounters.
Daily Progress
This section outlines our daily itinerary and distances covered.
Day 1: Parking Lot to Emperor Falls Campground
Since Kinney Lake and Whitehorn are popular campsites, we opted to stay at Emperor Falls, our first night, 16.91 km away. The hike from the parking lot to Emperor Falls was challenging, with 800 m of elevation gain over eight hours. Tackling the hardest part on day one made the rest of the trip much easier.
Parking Lot to Kinney Lake
The first seven kilometres to Kinney Lake are relatively easy, with some ups and downs and flat sections that offer the perfect warm-up and introduction to the Berg Lake trail. The path is wide enough to converse with your partner as you share excitement for this adventure.
When approaching Kinney Lake, you have the option to hike along the lake for its scenic views, as we did on our way to Emperor Falls, or in the forest for a more direct route, which we appreciated on our day out.
Kinney Lake to Whitehorn
Shortly after leaving Kinney Lake, you’ll be provided with a fork in the road. One trail takes you along the shore for 850 metres while the other one leads you higher up in the trees. You’ll get fantastic views from the trees (the trail we took on our way in), but it was pleasant to hike the shore trail on the return to avoid some elevation gain.
Tip: Route variation is recommended only when water levels are low.
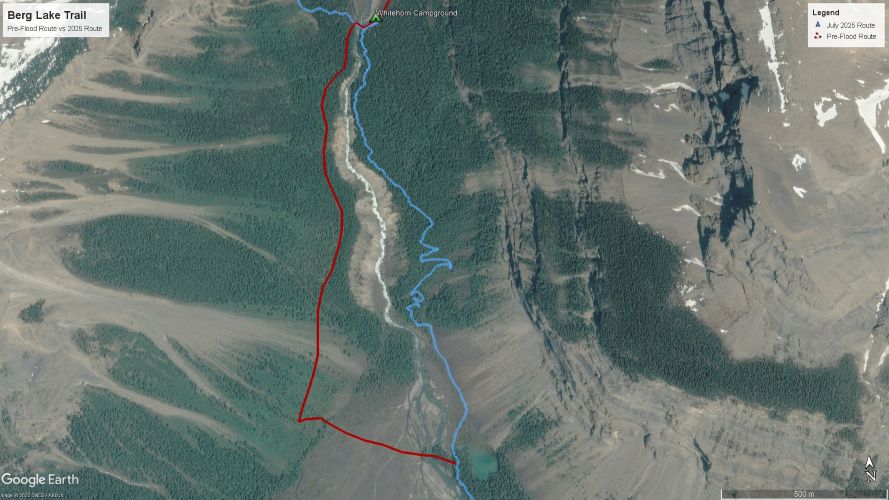
Further along, the old trail, marked in red above, crosses a bridge to the left (currently closed for repairs). It’s been rerouted to continue on the right side of the river, over boardwalks, a rocky section, and finally into a newly forested path. The old and new trails are roughly the same distance.
Whitehorn Campground
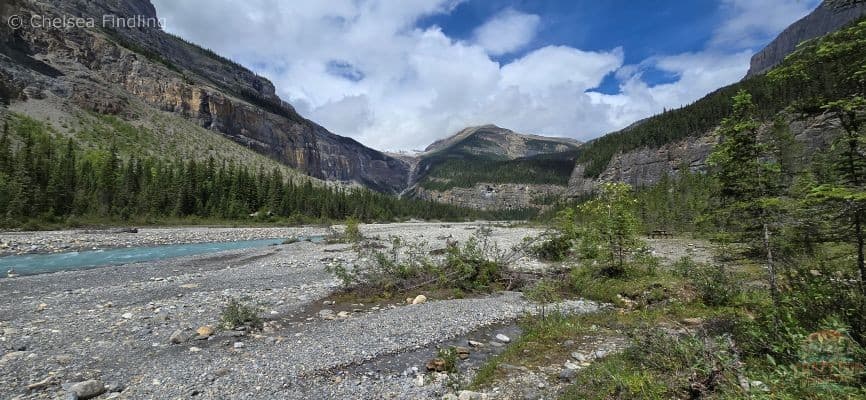
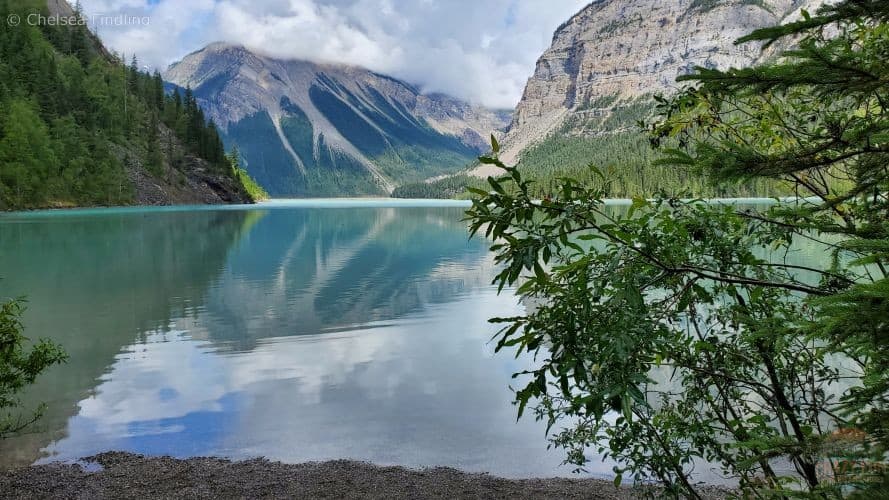
Photo credit: Kristopher Findling
This stunning view is what you’ll see upon reaching Whitehorn campground.
Whitehorn to Emperor Falls
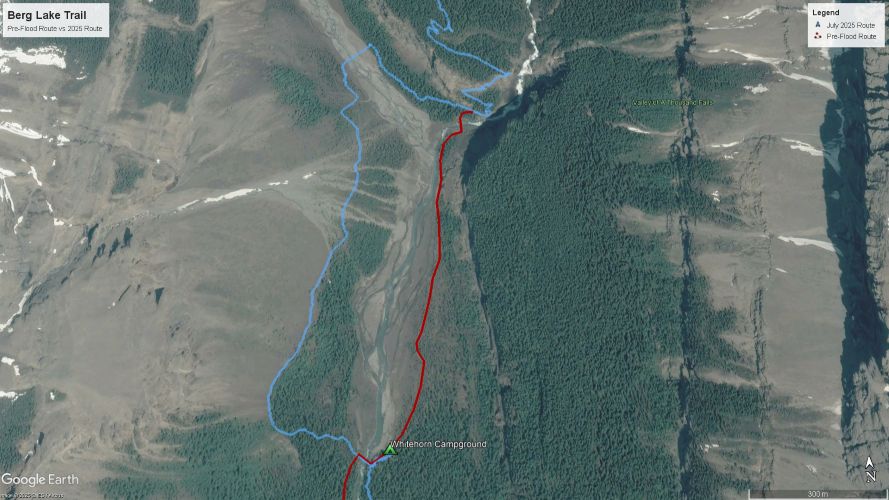
From Whitehorn to Emperor Falls, the trail has been rerouted. It used to leave the campground along the right side of the river (red trail as shown above), then cross a bridge to the bottom of the steep section. Now, you need to double back, get out of the campground, cross the river (blue trail), and head behind the ranger’s station. Continue up the valley, crossing back over at a higher point to return to the area beside White Falls. This adds 800 m to your day, which you really feel when doing this part of the trip.
Emperor Falls
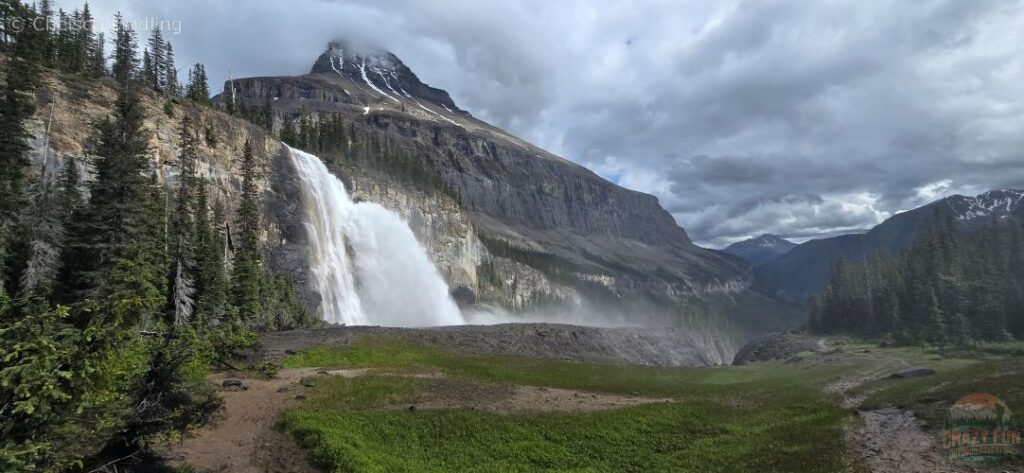
Photo credit: Kristopher Findling
The steep hike is 500 m in elevation gain. It’s a gruelling grind of switchbacks in what seems like a never-ending trail in the forest. Once you reach the sign to Emperor Falls, most of the steep sections are now behind you! Congratulations on getting that far! As you continue down the trail, the view opens up to breathtaking sights of Mt. Robson and Emperor Falls, a powerful waterfall cascading into the valley. Your jaw will drop, and you’ll be amazed at the view in front of you! Take pictures and videos and embrace the moment.
Tip: It might not be the best place for a snack and a break. The cool mist can reach high up the trail. Plan to get wet. While refreshing after a hot hike, it can be chilling when sitting still for a while.
Emperor Falls Campground

Photo credit: Kristopher Findling
Emperor Falls campground is another 0.5 km from the viewpoint, and you’ll arrive for the night. There are picnic tables for eating your meals beside the bear-proof lockers and an outhouse nearby.
Tip: Remember to bring toilet paper and sanitizer.
Day 2: Emperor Falls to Robson Pass and Afternoon Hike
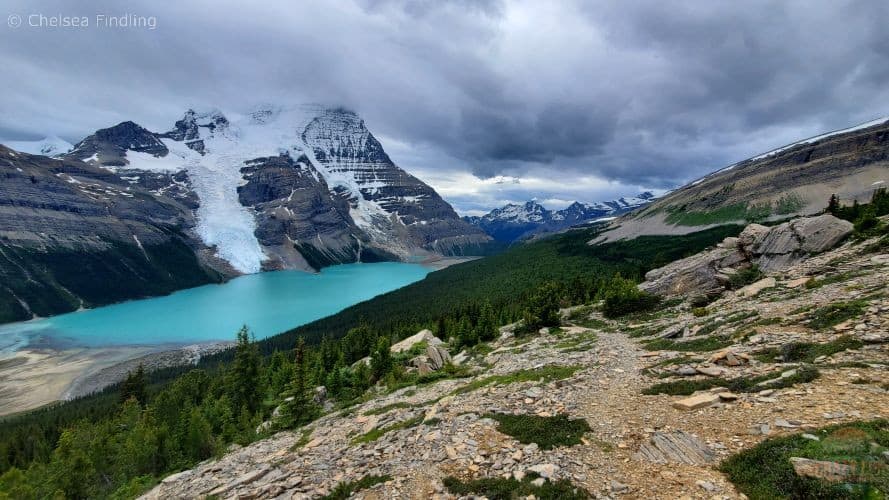
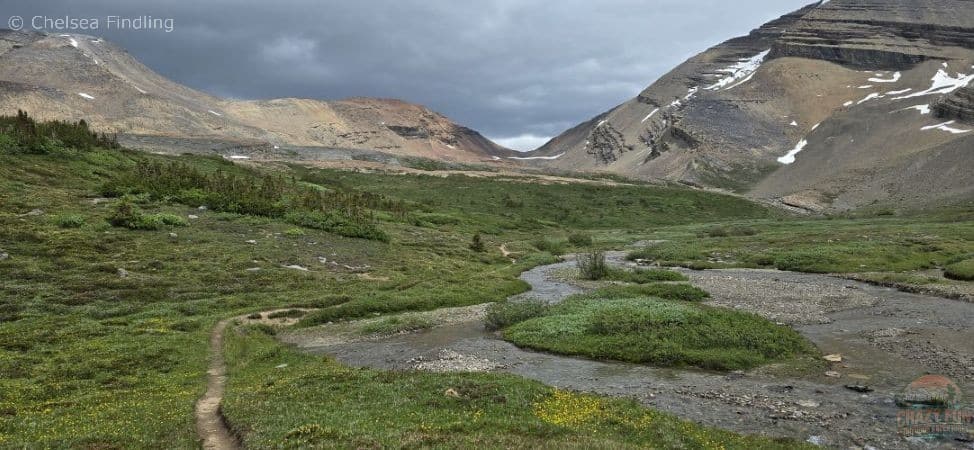
Emperor Falls to Robson Pass was much easier to backpack because it was relatively flat over 7 km. It was motivating to reach our destination, with gorgeous views unfolding as the landscape opened up to a series of stunning vistas.
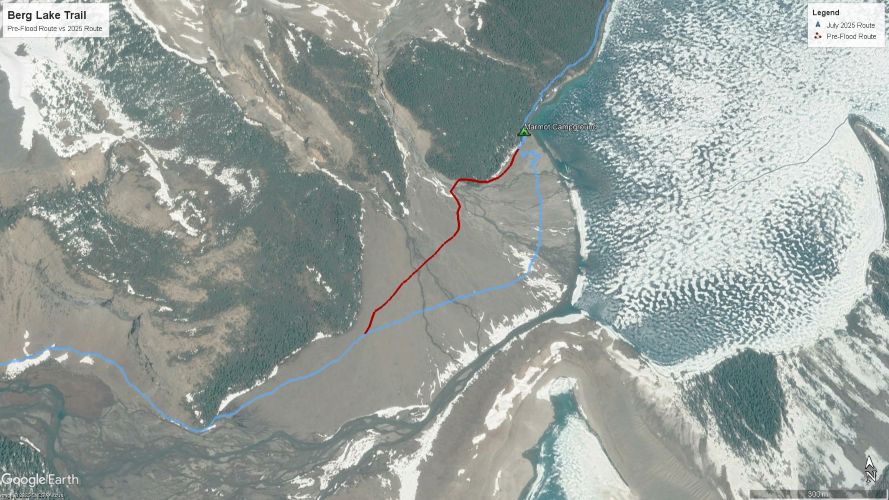
The old route, marked in red, used to be much higher across the terrain. The bridges were washed out in the floods. Now, the new trail in blue extends much further down, adding an extra 100 m to your trip. The new route takes you across a stream-filled alluvial fan with many boulders to cross. Note that the water levels in these streams can get quite high during periods of heavy precipitation.
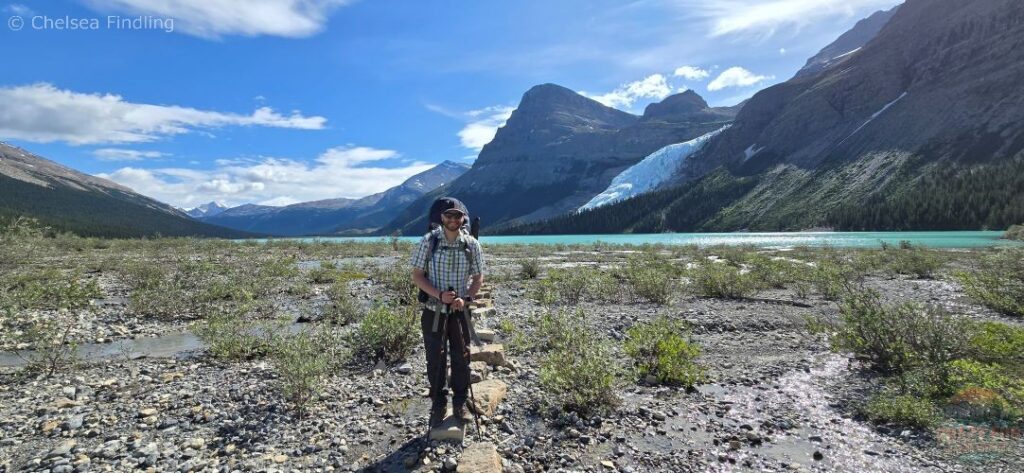
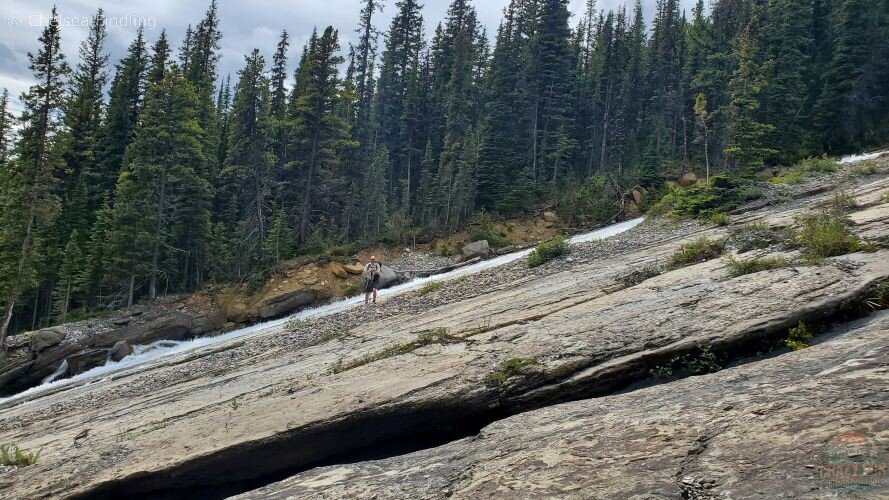
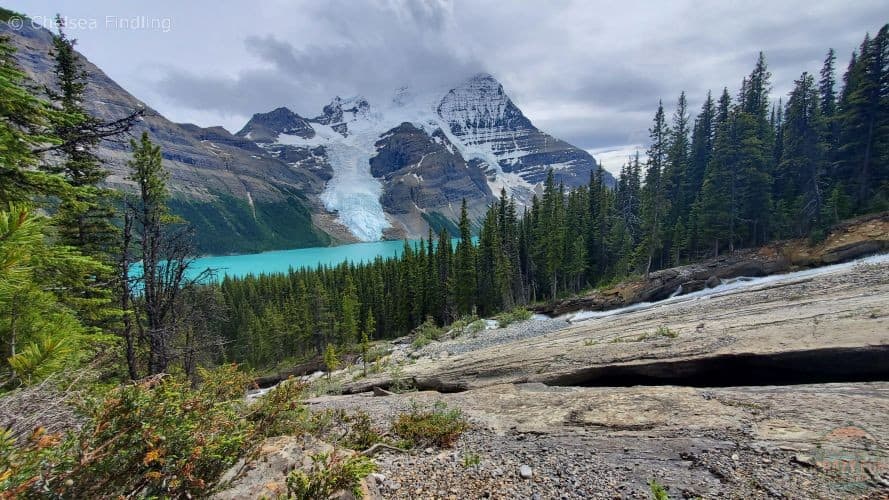
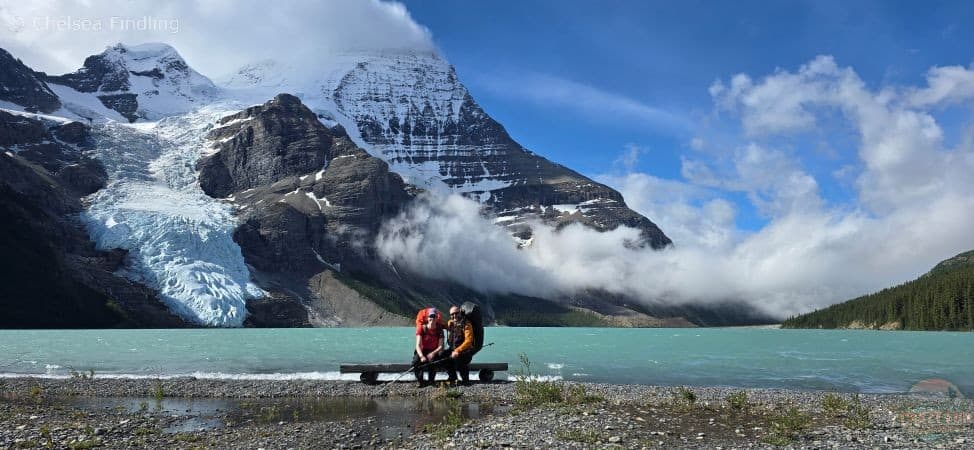
The long-anticipated wait is finally over when you walk up to the beautiful turquoise in Berg Lake! All the pictures you saw online, the view is even more spectacular than you could imagine! This is the lower section of the trail (indicated by blue on the map above). Kris is crossing the creek channels by stepping across rocks rather than using the bridges installed higher up on the old trail.
Berg Lake

The Berg Lake campground is a popular stop, with 26 tent pads and a large shelter for eating meals and keeping everyone dry when it’s wet. Direct views can be seen of the stunning turquoise lake
Robson Pass
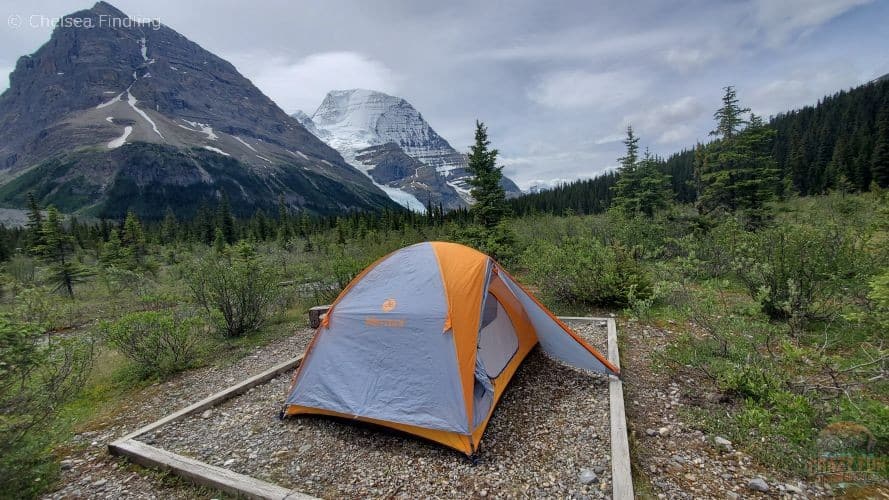
Robson Pass has fifteen tent pads, with some in the forest and others like ours in the wide open. We appreciated having a gorgeous view of Mt. Robson from our campsite. The downside is that when the weather rolls in, you don’t have any shelter, unless you snag one of the few stalls in the trees.
There are stunning hikes in the backcountry. We spent two nights at Robson Pass, which allowed us to hike in the afternoon on the first day and hike Snowbird Pass the following day.
Afternoon Hike to Toboggan Falls
You’ll need to double back from Robson Pass campground to Berg Lake to reach the start of the Toboggan Falls trail. The falls are a short hike, live up to their name with a sloping cascade and offer a moderate hike, perfect for stretching your legs after backpacking the epic Berg Lake Trail.
You’ll gain 300 m in elevation and will be provided with a stunning view of Mt. Robson behind the turquoise Berg Lake.
Mumm Basin

Continue towards Mumm Basin for even more spectacular views as you reach higher up.
Unfortunately, we couldn’t complete the Mumm Basin loop due to a large upper-mountain landslide. As a result, we turned around and were met with this magnificent view. Going up to Mumm Basin and back to Robson Pass campground, where we were staying, was 8 km. It was completely worth it to capture the changing landscapes and get a birds-eye view of the lake.
Day 3: Stunning Day Hike Views at Snowbird Pass
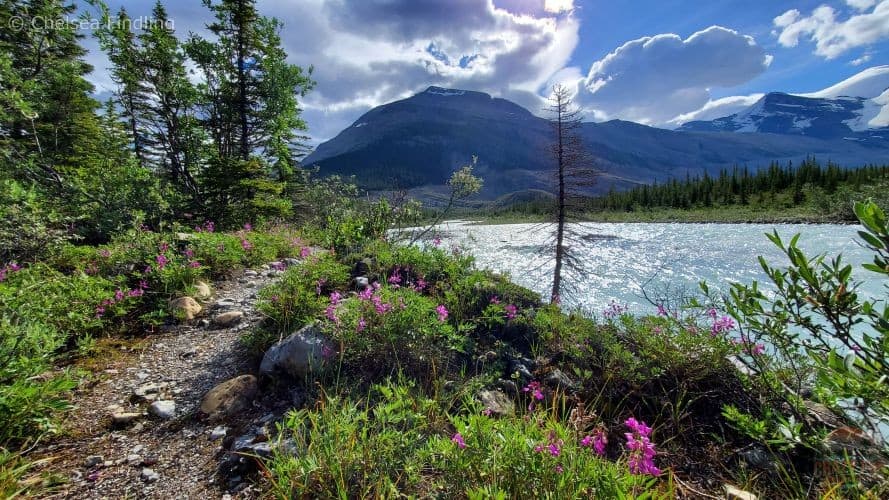
The 19.64 km in-and-out trail starts from Rearguard campground, along the left side of the river and towards Snowbird Pass.
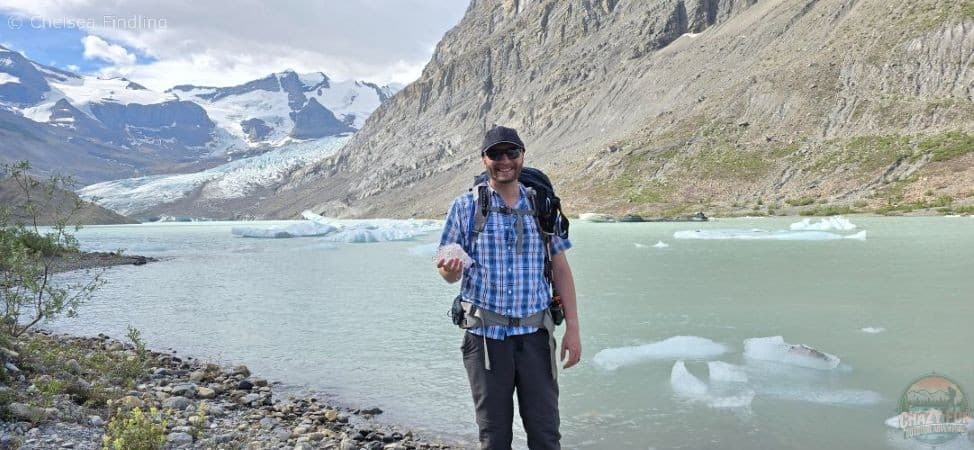
Kris found icebergs at the foot of Robson Glacier in Robson Lake.
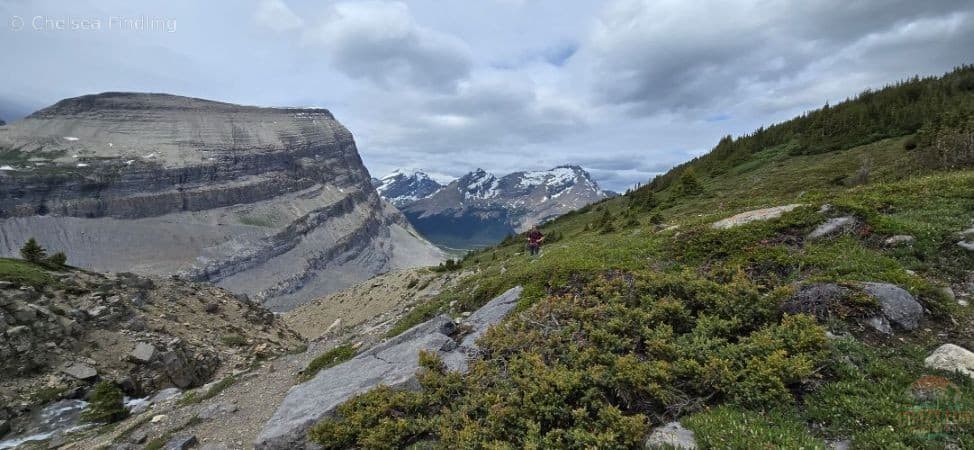
The trail begins by winding through rocky terrain, which can be challenging to navigate. Although inukshuks mark the route, we mistakenly followed the wrong set and ended up an hour off course, far below the actual trail. This detour forced us to scramble straight uphill to rejoin the proper path, costing us an hour.
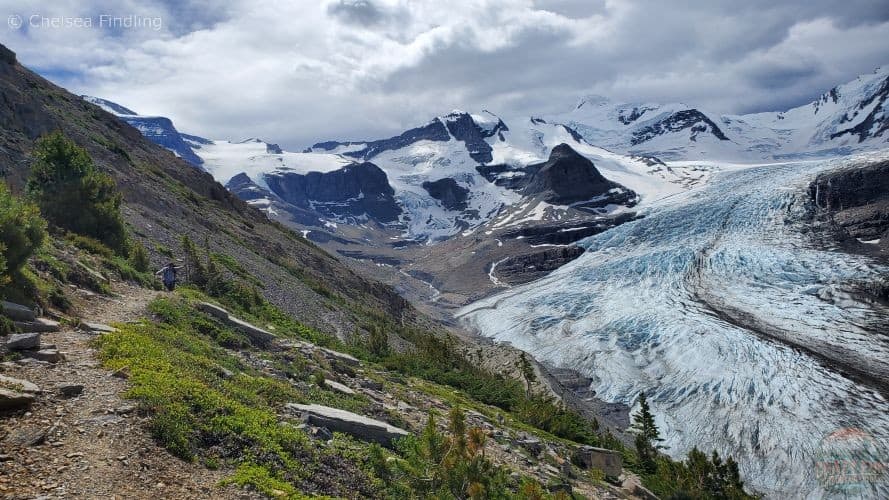
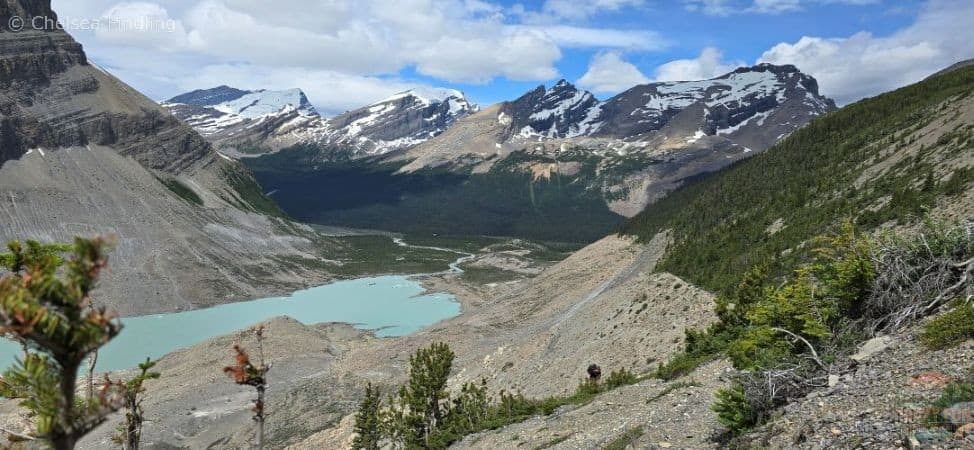
For much of the hike, the trail hugs the mountain’s edge, offering wide-open spaces and incredible views of Robson Glacier. Just be cautious with your footing—the drop-off is steep.
As we entered the subalpine area, we thought we were approaching the summit.
Unfortunately, that wasn’t the case. When we looked up toward the pass, we realized we still had several kilometres ahead of us—a distance that was far more than it appeared. Determined to beat the weather that was rolling in and capture awesome pictures at the top, we skipped most breaks and pressed on. We also didn’t want to risk a long return hike in a storm. It took a lot of motivation to keep pushing forward. We weren’t going to give up; we had worked so hard to hike up to this point, and there was no turning back until we reached the summit.

A kind woman from a group of women offered to take our picture as they went down the mountain. We were so close to the pass, but the weather was rolling in, so we wanted to capture our achievement before we got soaked. A selfie wouldn’t do it justice after it took four and a half hours to reach this point.
Snowbird Pass
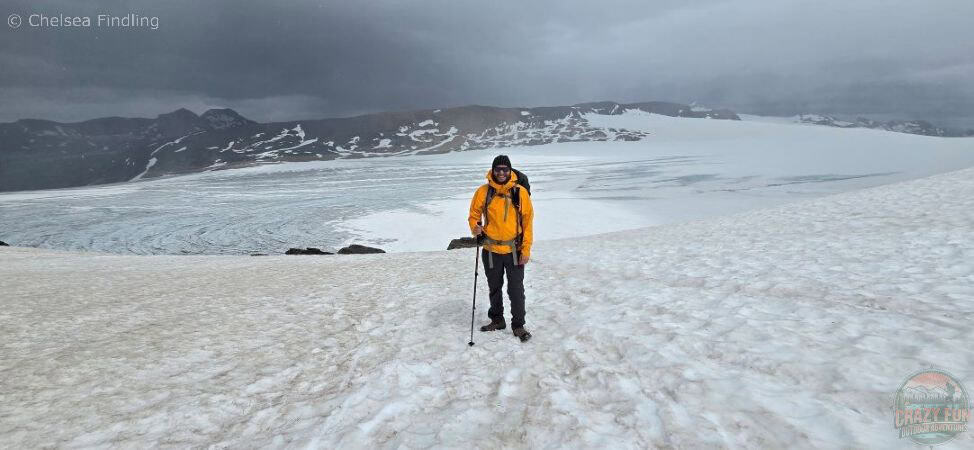
We had finally reached the pass after five hours! Kris is standing on Snowbird Pass, with the Reef Icefield behind him. We took a few pictures to commemorate our success and then headed back down.
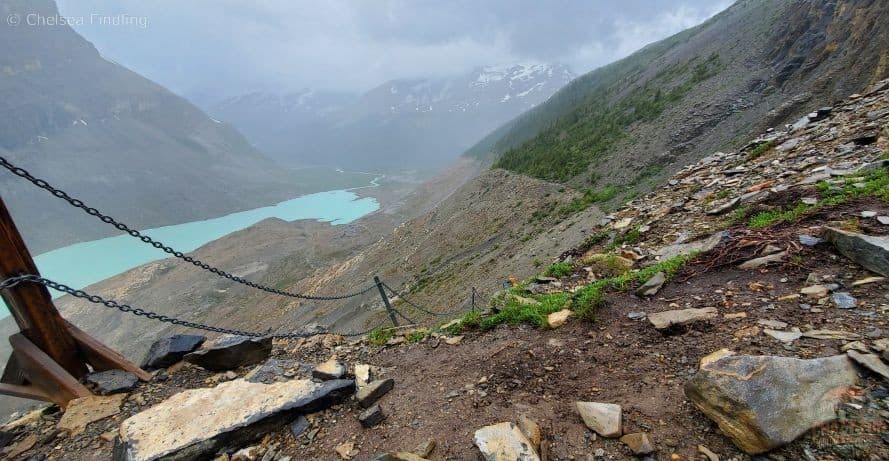
As the storm approached, we moved cautiously through the chain section on our way back. Fortunately, the rocks weren’t too slippery, making the descent more manageable. The rain came down hard, accompanied by gusty winds that made our hike back an extra challenge. We persevered, and after nine hours and forty-two minutes, we finally made it back to camp. It had been a tough day. We’d decided on a whim to tackle this trail without any prior research, but in hindsight, it turned out to be a stellar adventure—filled with stunning views and the thrill of accomplishing it together!
Day 4: Backpacked Robson Pass to the Parking Lot (24 km)
We had initially booked Kinney Lake for our fourth night, planning to camp there before an easy 7 km hike out the next day. However, with rain the night before and more in the forecast, we decided against packing up in wet conditions for such a short distance. Instead, we opted to tackle the full 24 km in one go, since most of the route was downhill, and reward ourselves with a real bed that night. The Tonquin Inn bed was pure comfort, but getting there was no small feat—the 24 km hike out took us 9 hours, and by the time we reached our vehicle, our legs felt like jelly. Still, we were incredibly proud—we’d just completed our longest backpacking day ever!
Tip: Be prepared for a long day and to be tired by the time you arrive at your vehicle.
5 Items I Always Pack
- Nalgene HDPE Wide Mouth Water Bottle, Clear, 48 oz with Hardside Hydration Swig Rig
- Crocs Unisex-Adult Classic Clog
- Battery chargers
- Columbia Women’s Silver Ridge Utility Convertible Pant: limit weight by combining pants and shorts into a 2-in-1. Wear pants earlier in the morning when it’s cooler and zip off the leg part when you want to put on shorts when the weather warms up.
- Buff Original EcoStretch Neck Gaiter, UPF 50 Sun Protection
What We Packed
- 1x (35-50 L) Osprey Women’s Eja Ultralight Backpack
- 2x (35-50 L) Pack cover
- 5x ABCOOL Keychain Clips Mini Carabiner (ex: attach a hat to a backpack)
- 1x Can of bear spray
- 1x La Sportiva Women’s Nucleo High II GTX Wide Hiking Boots
- 2x BLACK DIAMOND Trail Back Trekking Poles
- 1x Camera/phone
- 1x Small first aid kit
- 1x PETZL TIKKINA Headlamp
- Rab Siltarp Plus Shelter Three-Person Waterproof Lightweight Shelter Tarp
- Clothes
- Rain jacket
- Rain pants
- 100% Merino Wool – Women’s Midweight Base Layer
- Fleece for warming up at the campsite and sleeping
- Columbia Women’s Powder Lite II Hooded Jacket
- SmartWool Women’s Hike Light Cushion Margarita Crew Socks
- Minus 33 Merino Wool Top/Bottom Base Layer for sleeping
- Food/cooking
- Sleeping
- THE NORTH FACE Stormbreak 3 Three-Person Camping Tent
- 1x Exped Downmat Ultra 5R
- Sleeping bag
- Water/filtration
Food We Ate
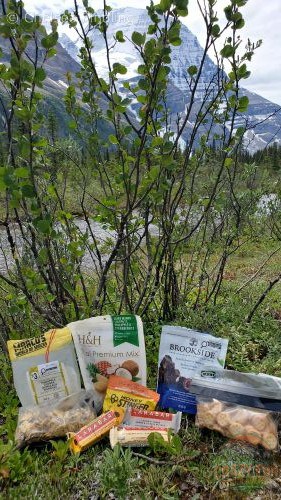
For quick morning prep, Kris and I both ate Larabars and Made with Local energy bars. They had enough calories to keep us full, and we didn’t have to turn on the stove to cook, which saved us time.
For lunch, we had:
- Beef Jerky, Peanut Butter Ritz Bits Sandwich Crackers
- soft tortilla wrap with tuna and fresh peas for the first day
Snacks included:
- Dried pineapple – a chewy sugary snack with fibre
- Dried fruit – chewy variety
- Honey Stinger energy chews
- Chocolate-covered blueberries – a snack with fibre
- Corn flax chips
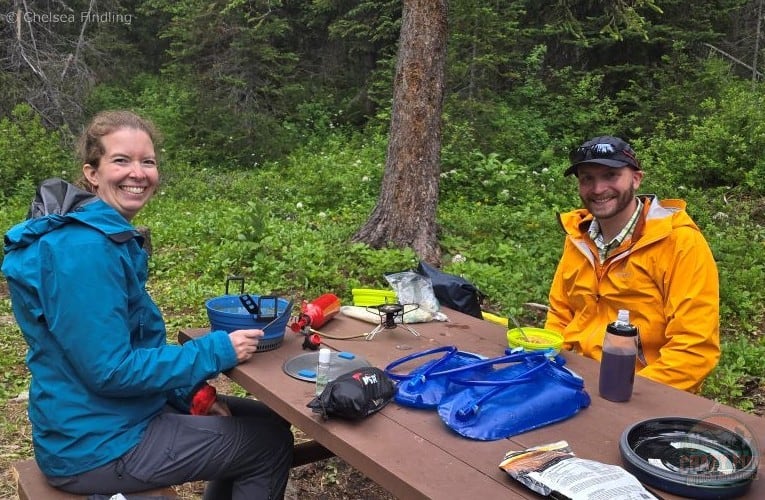
Hamburger Helper lasagna was our first supper as we celebrated our 2nd wedding anniversary at the Emperor Falls campground. We met a lovely couple from BC who kindly took our picture. We loved the opportunity to have different conversations with multiple people of various ages along the way. It’s fun to compare stories and trips of where we’ve all been.
Every supper consisted of a different package of Hamburger Helper. They offer a variety of flavours and are easy to prepare. It comes with the noodles and sauce packages, with the option to add meat and vegetables. We dehydrated hamburger, spinach, corn, peas, and green beans. We put two different types of veggies in every meal. For two meals, we substituted tuna for hamburger to mix up the protein.
Tip: Choose tuna packages over cans. It’s lighter, and it comes in a ready-to-go package perfect for backpacking.
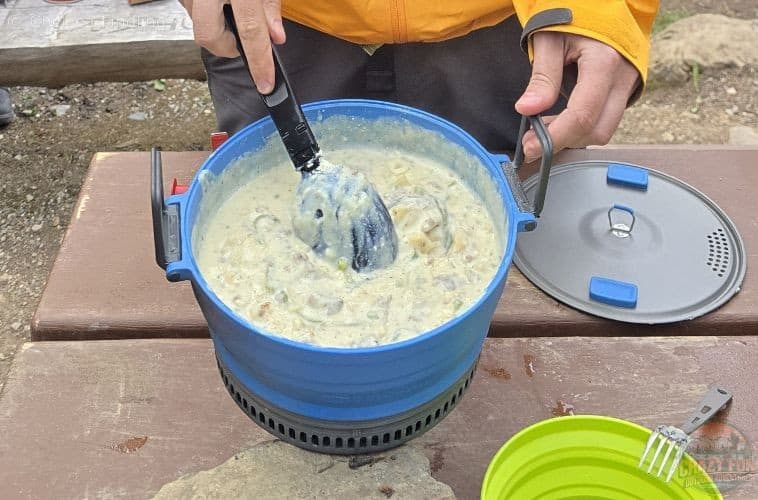
Our second night, we had Hamburger Helper Stroganoff. Here’s a link to backpacking meal prep: how to dehydrate your own food.
Where to Stay Before and After
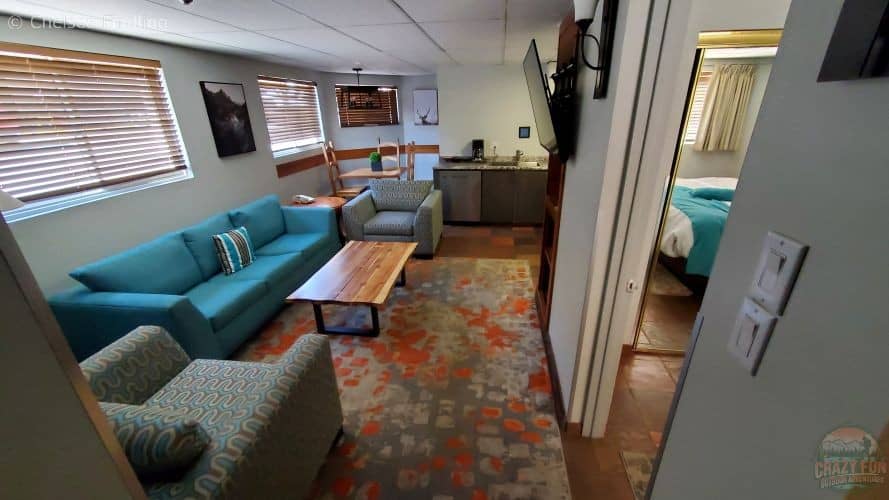
Tonquin Inn is the perfect hotel for a stay before and after your trip. They offer a variety of bedroom options, including suites at different price points. They are located on the east side of town, with restaurants only a few minutes’ walk away. A restaurant is conveniently located on site. A pool and hot tub will encourage you to relax after a hard day of hiking on Mt. Robson’s Berg Lake Trail.
Final Thoughts
Ready to hike Mt. Robson’s Berg Lake Trail in 2025? It’s a phenomenal trip! With its dramatic, glacier-turquoise waters and stunning mountain scenery, the Berg Lake trail remains one of the most unforgettable hiking adventures in Canada. The recent updates make this year the perfect time to experience its magic – whether it’s your first trek or a long-awaited return. Start planning early, pack smart, and prepare for an adventure you’ll never forget. Want help getting started? Download our Free Berg Lake Packing List here (link) and grab the Ultimate Adventure Planner to make your trip stress-free!
Additional Links
- Ultimate WCT Packing List
- West Coast Trail: Exciting Food
- West Coast Trail Tips
- Stay Positive Backpacking in the Rain
- Backpacking Poboktan Trail Successfully
Trip Resources
- Book your flights with Expedia
- Book your hostel through Hostelworld.com
- Book your hotel with Booking.com or Hotels.com
- Book your vacation rental with Vrbo
- Book your experiences through TripAdvisor, Manawa
- Book your guided trips through Viator or GetYourGuide
Pin It
Leave a Reply