This post may contain affiliate links. If you purchase through my links, I might receive a small commission, at no additional cost to you.
Guide to Winter Backpacking Into Jacques Lake Hut includes everything you need to know from accommodations the night before, and what you need to pack into your backpack including food, gear and clothes. Step-by-step trail pictures provide a sense of what you could encounter. If you’re lucky like us, you might also get to spot some moose on the trail! That was an amazing sight to see. Cooking, heating, sleeping arrangements, water retrieval and barrel replacement are all covered in this guide to help you understand everything involved before booking this hut in the winter months, the only time it can be booked.
Table of Contents
Booking Jacques Lake Hut
Alpine Club of Canada maintains Jacques Lake Hut, a Jasper Park Patrol Cabin. Members can book six months in advance at $50 per person per night. Non-members can book three months in advance at $60/night. Find more information about the hut here. Reserve on the Parks Canada website.
The trail covers two avalanche areas. Make sure to check the conditions before heading out on the trail.
Sometimes the trails can be travelled by cross-country skiing but the conditions must be favourable. The snow was sticky when we went so we decided to hike.
Accommodations the Night Before
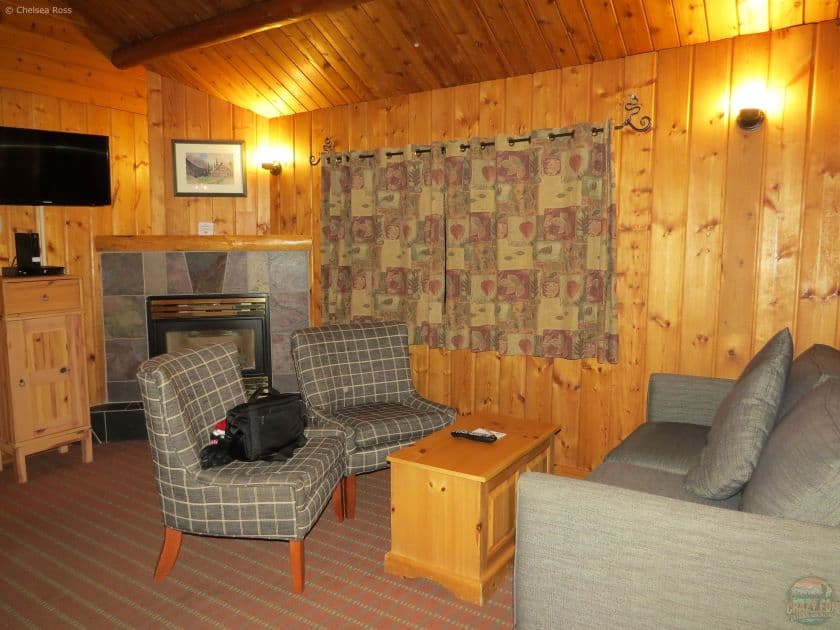
We drove to Jasper the night before heading into Jacques Lake Hut. There are many options when staying in Jasper. We love Bear Hill Lodge. It’s a cozy place to stay. They offer individual rooms or rooms that can accommodate a few couples. It can be nice to hang out and share the space. Some have kitchenettes to cook and enjoy a meal together. Some rooms are open-concept, while others have separate rooms. I appreciate having different options available. Everyone has their own preferences. If you’re looking for a nice place to stay with good hospitality, I suggest Bear Hill Lodge.
Food
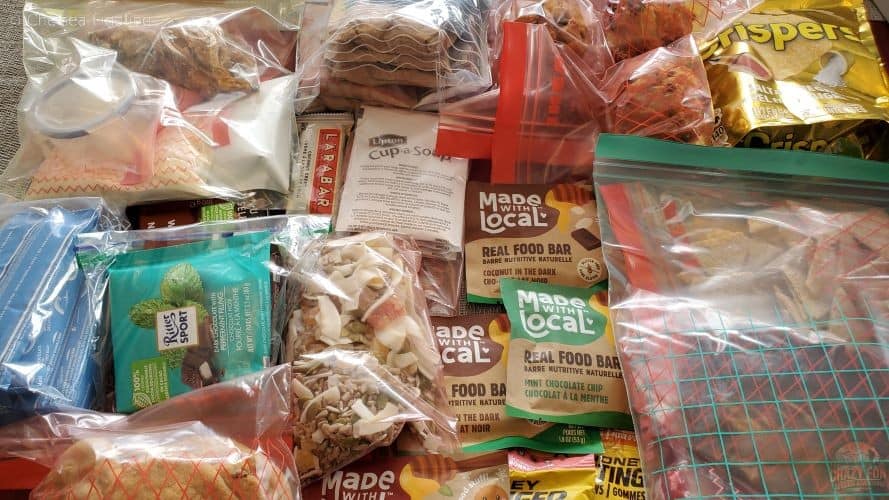
There are unlimited options to bring for food. The amount needed depends on how long you plan to stay at the hut. Crackers over time will break up into a million pieces. Fresh vegetables typically don’t last more than two or three days. Since we were only going in for three days and two nights everything faired nicely. I always like to bring a couple of cup-a-soup in case we get chilled and need an additional snack to warm us up. Made with Local bars (in the picture above) are tasty, and available in different varieties. The best part is that they are chewable in winter! They don’t freeze like most bars. Below is the food we brought.
Breakfast
- Oatmeal (2 packages/day)
- Hot chocolate
- Muffins (They break up easily but Kris likes them and they survived in his pack!)
Lunch
- Jerky from Alberta
- Sugar snap peas
- Babybel cheese
- Triscuits for myself
- Crispers for Kris
Tip: Tuna can be a nice addition to crackers for lunch but I decided against it during our winter hike. It can get messy and I didn’t want to chance my hands getting cold preparing my lunch. It’s an ideal choice in the summer but is a trickier item in the winter. I picked items that would be quick and easy to eat while wearing mitts.
Supper
- Dehydrated supper #1:
- Chicken
- Green beans
- Peas
- Corn
- Mashed Potatoes
The mashed potatoes rehydrated with a bit of margarine were combined with chicken and veggies which tasted delicious. It didn’t take very long to cook either. I boiled water from the creek for ten minutes and put my dehydrated chicken, green beans, peas and corn into the pot of boiling water for thirty minutes. Once everything was rehydrated, I boiled milk for the mashed potatoes, added the margarine and the potatoes, mixed it all and voilà it was ready. I brought this meal for the four of us.
- Dehydrated supper #2:
- Hamburger
- Hamburger helper box with noodles and spices
- Cauliflower
- Broccoli
- Carrots
My mom prepared this tasty meal for the four of us. Kris, who loves Hamburger Helper was over the moon about this supper choice. Having only one supper to prep was nice.
Snacks
- Nut mixes
- Granola bars
- Made with Local bars
- Chocolate bars
- Chocolate chip cookies
- Organic Chews
Extras
- Tea
- Cup of Soup – in case we needed to warm up
- Gatorade
Clothes
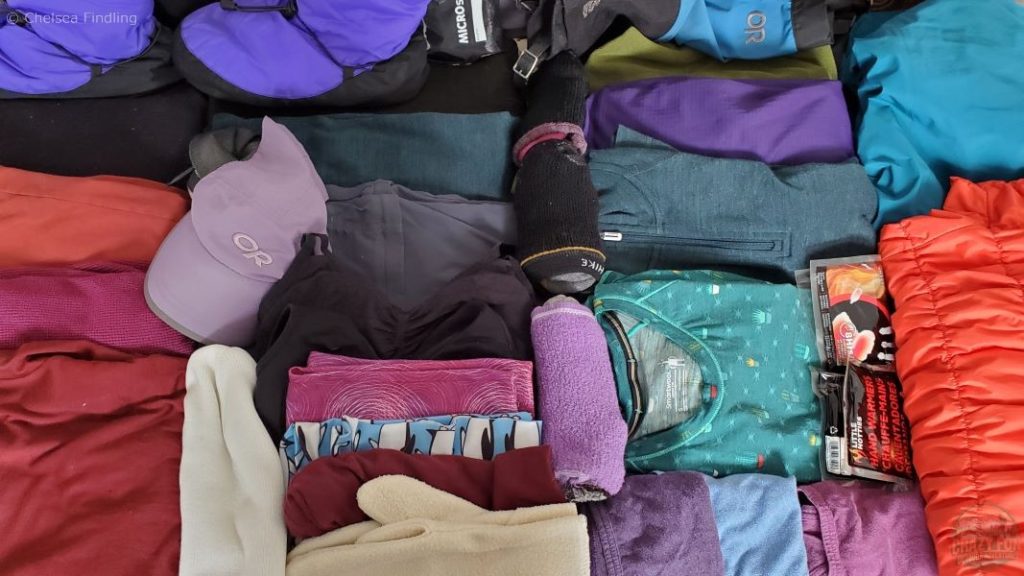
It’s hard to know all the layers you’ll need for winter backpacking Into Jacques Lake Hut. You might want to bring many layers but you’re limited on space and clothes are heavy. Most importantly, you’ll want to ensure you have different sets of clothes for hiking and hanging around the hut. You can get cold quickly if you stay in your sweaty clothes. You’ll warm up quickly by changing into a fresh set of clothes. Plan according to the temperature. A change from -17°C to +11°C was announced for us. We needed different clothing to fit that weather change. A down jacket is useful to keep you warm while also being lightweight. Having a shell jacket to keep the snow, wind and rain from penetrating the rest of your clothes is also important. Below is a list of clothing I brought:
Top Layers for Hiking
- Bra
- Merino 250 Top Base Layer 1/4 Zip Long Sleeve – Women’s
- MEC T3 Merino Base Layer Long Sleeve Top – Women’s
- Light Down jacket
- Arc’teryx Shell Jacket
- Chaos Multi Tubular Headwear – Unisex (will do wonders to protect your face against potential wind)
- Mitts/Hat
- Hand warmers
- Baseball cap
Bottom Layers
- Underwear
- Merino Pant Base Layer for Women
- Fleece pants
- Thick wool socks
Layers for Sleeping/Sitting in the Hut
- MEC T1 Merino Base Layer Short Sleeve Top
- MEC T3 Merino Base Layer Long Sleeve Top
- Merino Pant Base Layer for Women
- Fleece Pants
- Hut booties – they are warm on your feet and give you a break from your boots
Toiletries
- Toothbrush/toothpaste
- Hairbrush/elastics
- Contact lenses/sunglasses/glasses
- TP/sanitizer
- Sunscreen
Gear
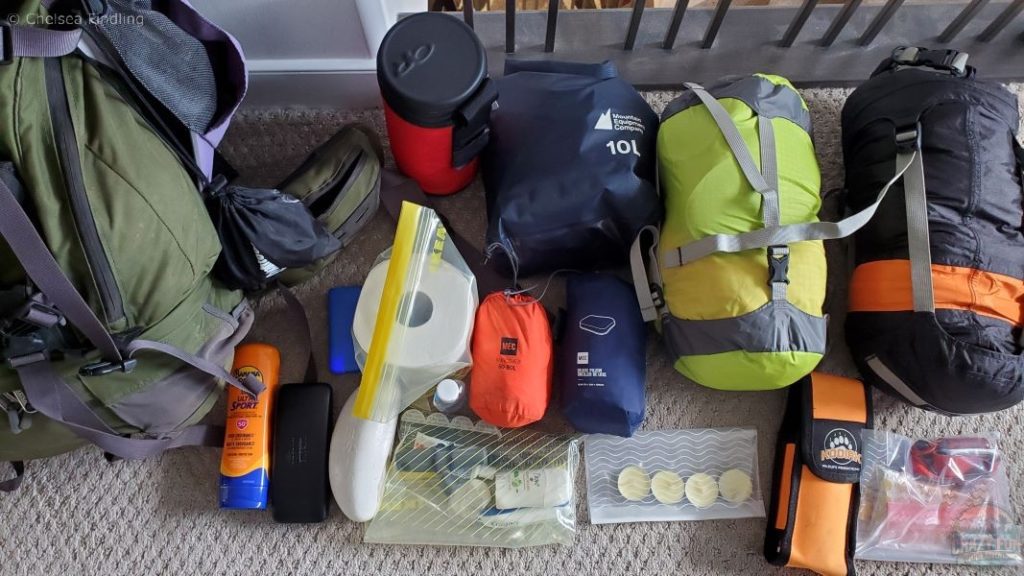
It’s important to have all the right gear when heading into Jacques Lake Hut.
What We Brought
- Backpack
- Olang Parigi 2.0 Spike Boot – this boot is insulated to keep your feet warm but got wet from the snow soaking through the boot (I don’t recommend using them if there’s new snow you need to walk through)
- Kahtoola Microspikes – brought in case we encountered ice, thankfully we didn’t need them
- MEC Kokanee Gore-Tex Gaiters – Unisex – helps keep the snow out of your boots
- Hiking poles
- Bear spray
- Water bottle and sleeve to keep the water from freezing
- Sleeping bag
- MEC Deluxe Pillow + pump
- Phone, cord, external power
- Headlamp + spare batteries
- Matches to light the propane stove
- Candles in case of emergency or for additional light
- Dry bag – to keep our food dry
- Stuff sacks – compress everything into a small ball but the bags aren’t waterproof
What We Didn’t Require
- Pots
- Fuel/stove
- Bowls, plates, cutlery
- Water filter
- Mattress
The beauty of staying in an Alpine Club of Canada Hut is that you don’t need to bring cooking fuel/stove, pots, bowls, plates and cutlery. We boiled our water for ten minutes so we didn’t require the water filter. The mattresses are provided which cut down on weight. It felt nice to have a lighter pack.
Start of the Hike
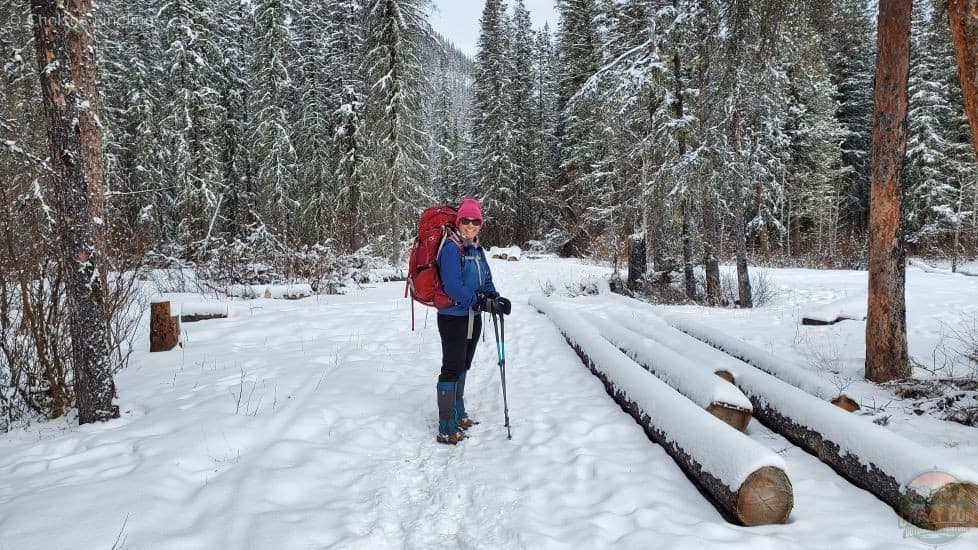
The trail was a moderate difficulty with little elevation gain. We started on a snowy path that was nice and wide following previous footsteps. We ran into a family hiking the trail for the day. A hiking day trip is another option for this trail. Once we passed the family, we had to break the trail since no one had been further along the trail in the fresh snow.
Beaver Lake
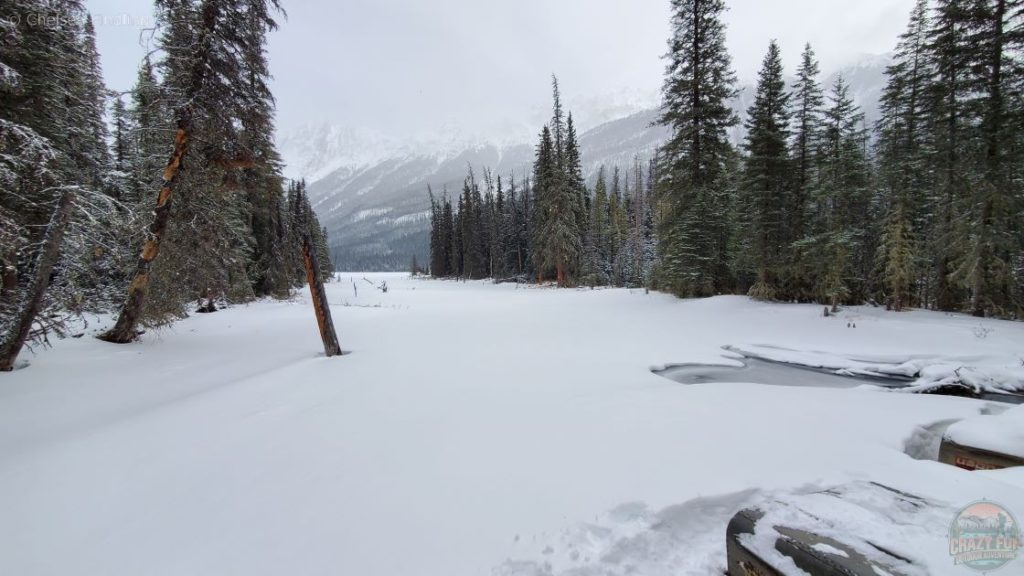
Rowboats were stashed away and upside down when we arrived at Beaver Lake. Although some people walked on the lake to cut across and save time, the ice on the lake wasn’t trustworthy with the current temperature and weather change at that time. The right of the picture shows thin ice under the light dusting of snow. We chose the safe route and took the trail. We enjoyed the gorgeous snowy view of what lay ahead.
First Summit Lake
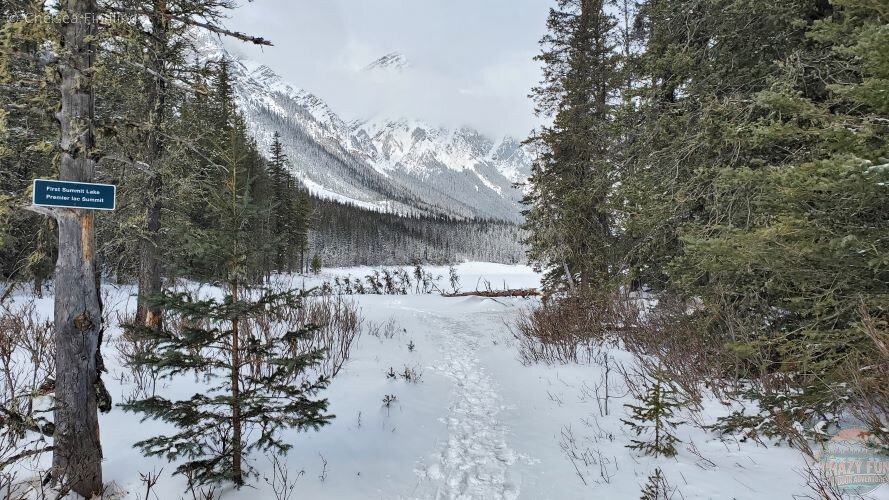
A few steps ahead is First Summit Lake which shows the entire lake from one camera angle. With no tree coverage, the lake was extremely windy. We didn’t stay here very long. We backtracked a few steps to the kilometre sign we had passed and continued towards Jacques Lake Hut. The lake can be seen while continuing on the trail if you wish to take more pictures.
Many Trees Down
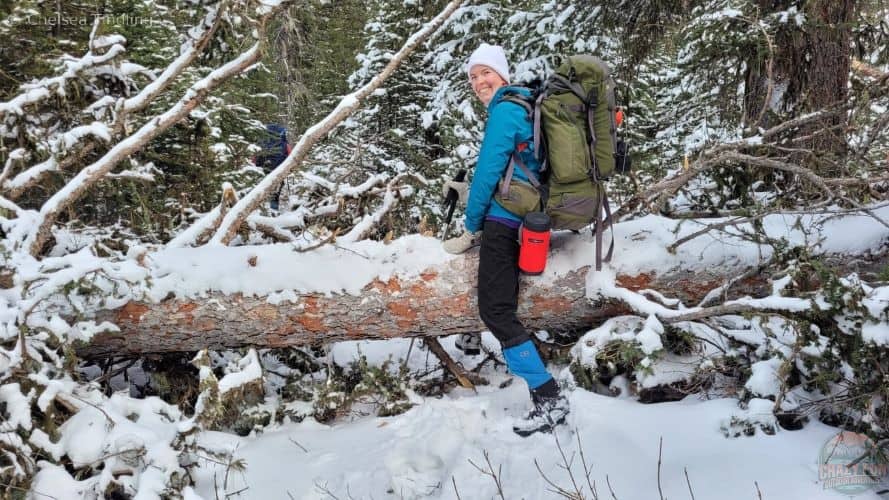
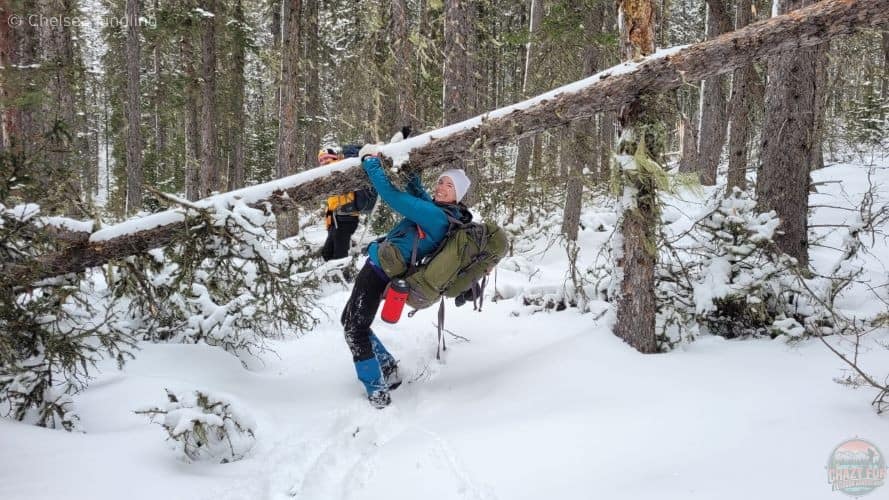
Once we continued on the main trail, it narrowed and we discovered many trees had fallen. Some trees required us to go over them while others necessitated us to go under them with our big packs. By the end of this section, we counted fifty trees that had fallen. It took some time to get around these trees. Since we couldn’t follow previous footsteps, it was easy to lose our trail, which we did temporarily. The trail wasn’t clear cut and the fresh snow didn’t help our route-finding.
Lunch Time
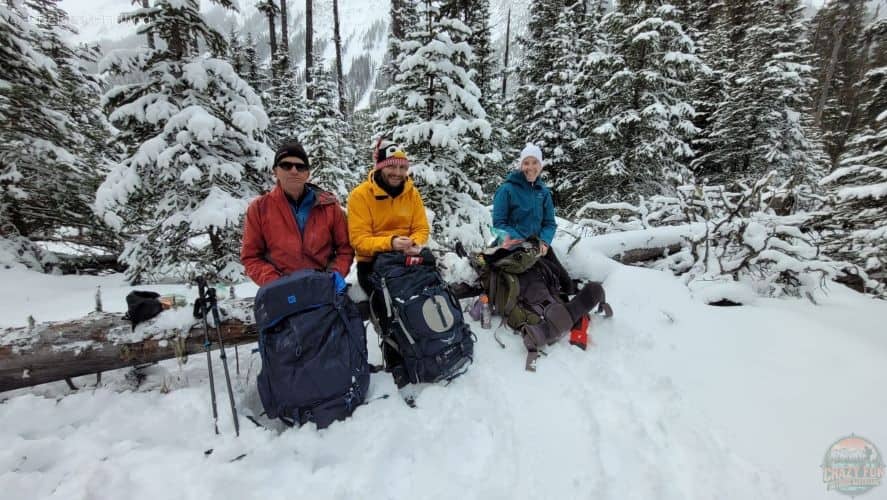
With so many trees down and needing a break, we ate our lunch on a fallen tree. It was great to sit for the first ten minutes until I realized that the snow was starting to melt and go through my pants and mitts I had placed under my butt. I stood up to prevent everything from getting wet and causing me to get cold. The lunch that I picked for us ended up being perfect for the cold and snowy weather. We took a twenty to thirty-minute break and continued once we started to get a bit chilled.
Tip: Start moving to get warmed up before you end up frozen. It takes longer to warm everything up while backpacking when you’re cold.
Second Summit Lake
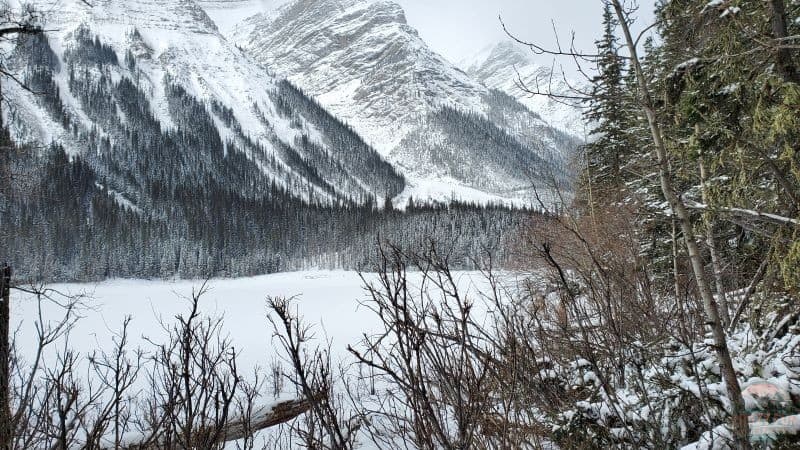
We reached Second Summit Lake. There were still some fallen trees but less so by this point. We were eager to reach our destination. We took a couple of pictures and kept backpacking to Jacques Lake Hut.
Moose
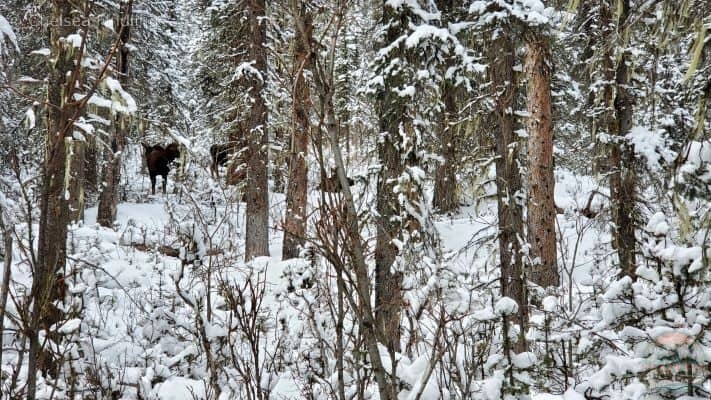
We were fortunate to see four moose just off the trail in the trees! They stopped us in our tracks and we admired them for about five minutes by taking many pictures and videos. After about five minutes, the moose started making noise. We got the impression it was time for us to go with them no longer being comfortable sharing their space with us in nature. Being respectful and courteous, we kept backpacking, leaving them behind.
Tip: Keep your distance to keep yourself safe and to ensure they don’t feel threatened by your presence in their space and too close to them.
Gorgeous View
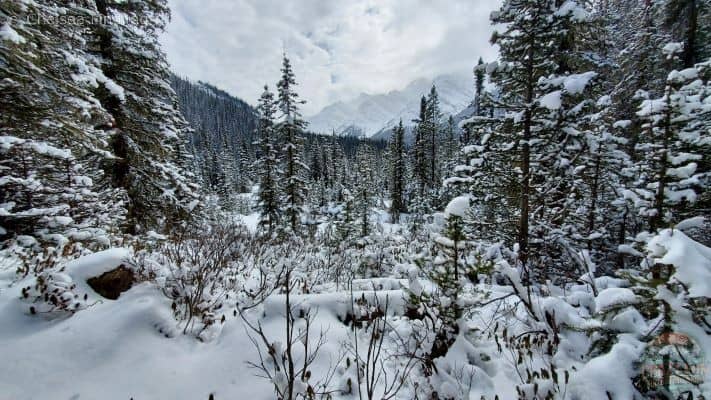
After the fallen trees, the landscaped opened up to a gorgeous view. We were looking back at the mountains behind us.
Are We There Yet?
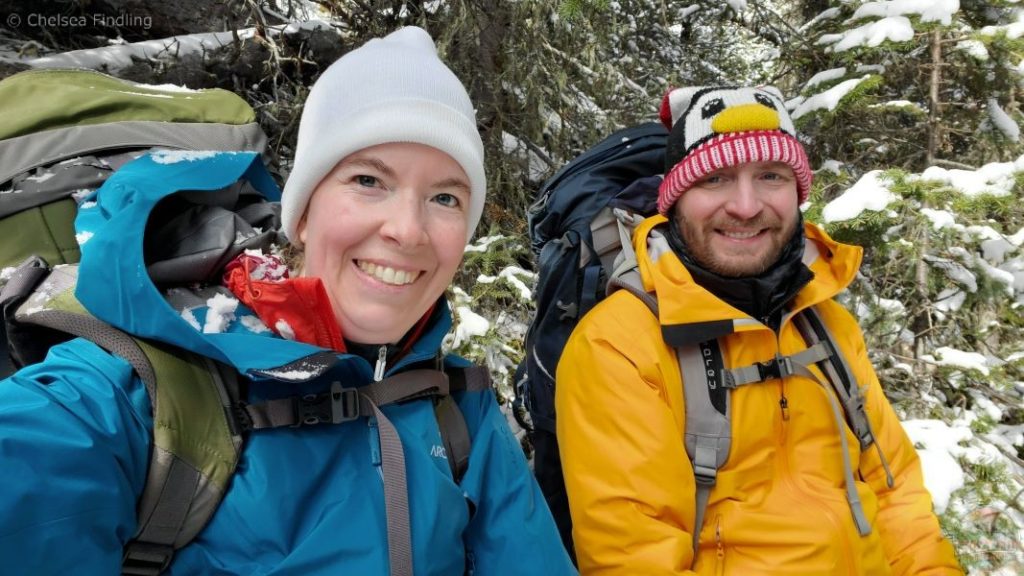
Just after this view, we ran into a trail marker indicating that we had reached the ten-kilometre mark and still had two kilometres to go. It was disappointing thinking we were almost there but in fact, we still had a bit more trail to hike. We were tired by this point and took a break on the side of the trail for a few minutes before motivating ourselves to finish the trail and be done hiking for the day. My tracker read fourteen kilometres by the time we reached the hut but the trail marker only indicated that the trail was twelve kilometres long. I think the trail length is fourteen kilometres. Keep that in mind when backpacking. It might take you longer than you initially expected.
Jacques Lake Hut
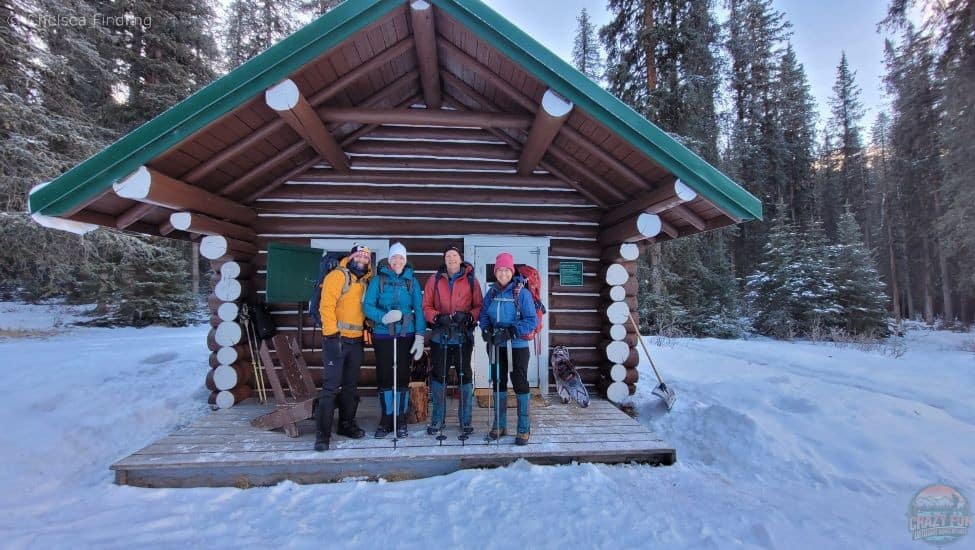
Kris, my parents and I had reached the Jacques Lake Cabin after seven hours of hiking. It took us a while to get there but with the snow-covered path, trees that were down and having to find the trail again while taking some pictures and videos, it accumulated a lot of additional time on the trail. We were happy to have arrived!
Inside the Hut
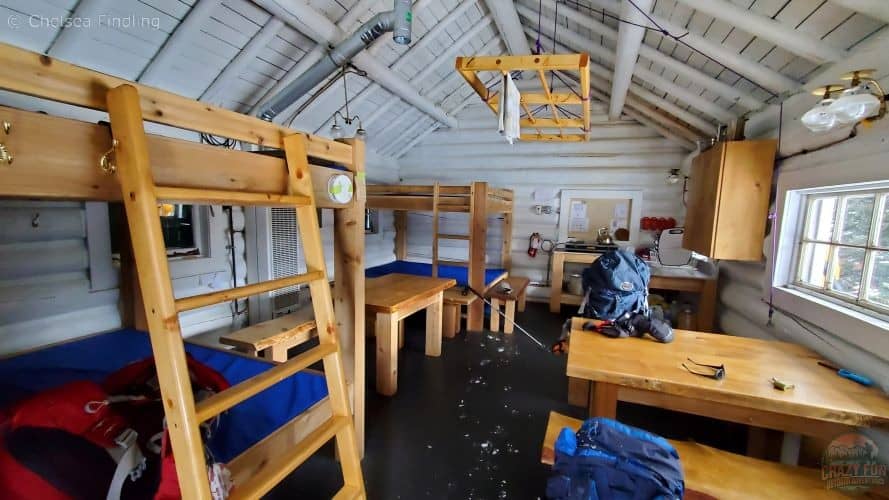
Jacques Lake Hut has four double mattresses, two tables, one propane heater on the wall between the beds, one drying rack for clothes, one propane stove and propane lamps. It’s a cozy hut but a nice place to get away from home for a few nights. The cooking area at the back has three basins for a three-step process to wash dishes. Dishes are washed with warm soapy water, rinsed in warm water and sterilized in bleached lukewarm water in the third basin. The bleach is counterproductive if you add it to boiling water as hot water decomposes the active ingredient of bleach and renders it ineffective. The rules state that it’s imperative to follow the three-step process to avoid bacteria accumulation on their dishes.
Sleeping Arrangements
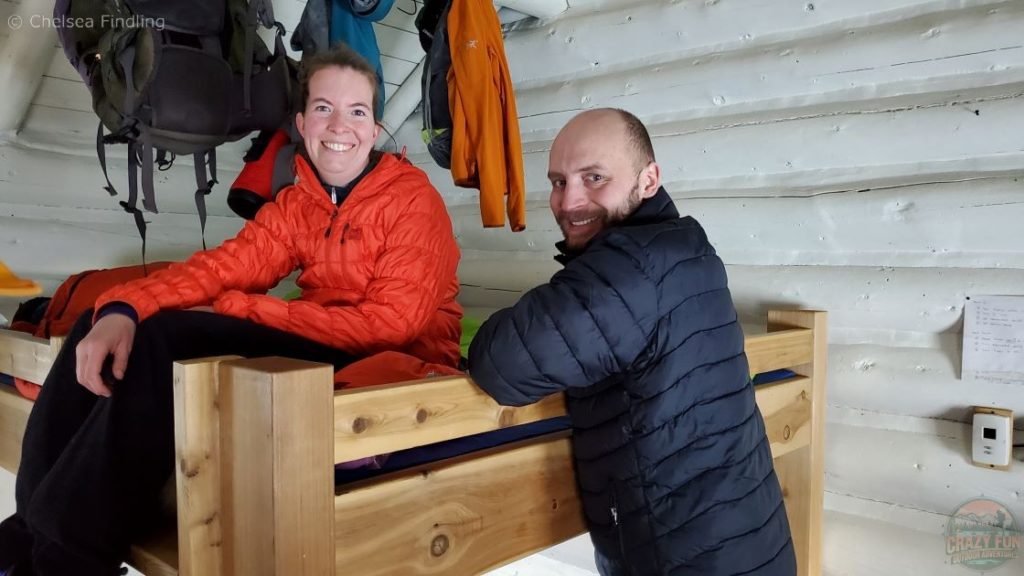
As you can see on the right side of the picture, there’s a thermostat and next to it is a timer (not shown in the picture). The pilot first needs to be lit to start the furnace between the beds. The heater is connected to a large propane tank at the back of the hut. The timer to heat the hut lasts up to six hours once you crank it and turn it. The maximum time is ideal so that the heater doesn’t run constantly and in case someone forgets, it shuts off automatically.
Tip: If it feels cold when the timer is cranked, adjust the thermostat and increase the temperature so it warms up.
We set our backpacks high up above our beds out of reach of potential mice. Luckily, we did not see any evidence of mice in the hut. Heat rises; it’s always warmer on the top bunks compared to the bottom beds, which makes it nice for sleeping. It can get cold in the night on the bottom bunks. Kris found it was way too warm on the top bunk the second night and slept on top of his sleeping bag. It’s not a perfect science. It’s easier to dry clothes up top so we chose to dry our clothes above our bed. Kris did find a partially melted chocolate bar in his pack high up in the hut!
Getting Water from the Creek
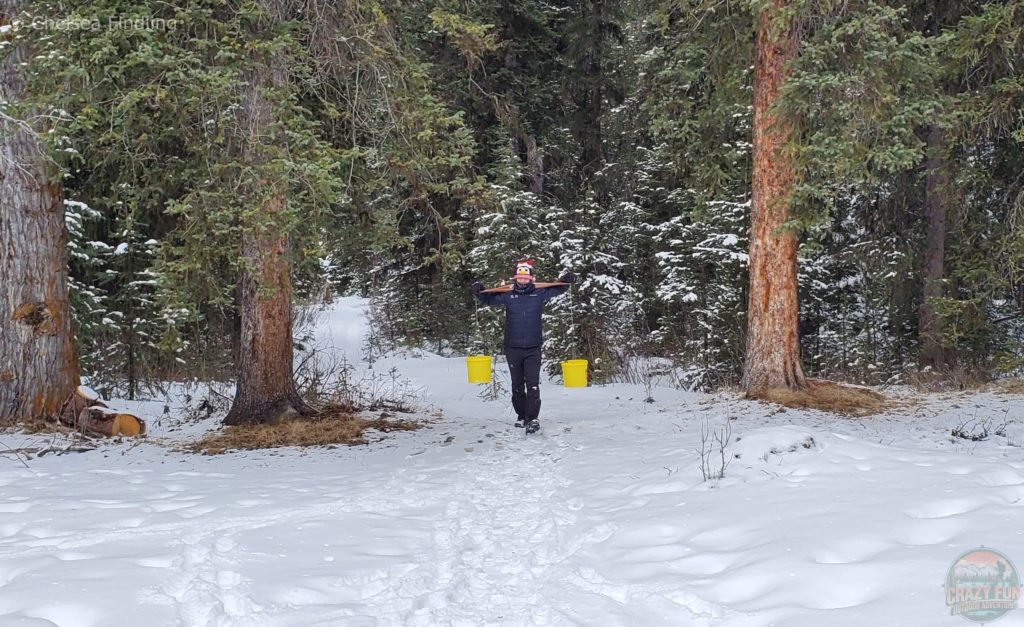
Kris carried both buckets in his hands initially and then tried carrying them with a shoulder pole, found in the hut. It turns out, this way was more difficult. Carrying buckets of water in both hands was easier. When the temperature is colder and the creek is frozen, snow is gathered and boiled for water. Since the temperatures were warmer when we visited the hut, we hauled water from the creek five minutes away and brought it back to the hut.
Tip: Make sure to boil water for ten minutes to kill microorganisms such as bacteria, viruses or protozoans before using it.
Supper
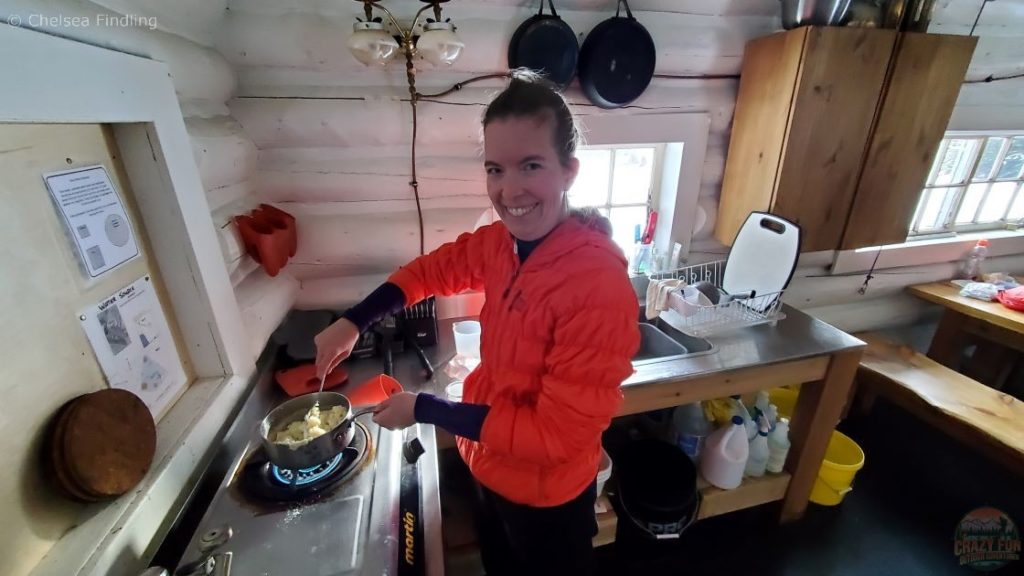
I was in charge of cooking supper the first night. In the above picture, I was in the process of mixing the potato package in boiled milk and melted margarine to then combine with dehydrated chicken and veggies. One stove burner turned on automatically while the other one required to be lit with a match since it wasn’t working properly.
Tip: When grabbing the kettle handle, make sure to grab an oven mitt to prevent burning your hand on the hot metal.
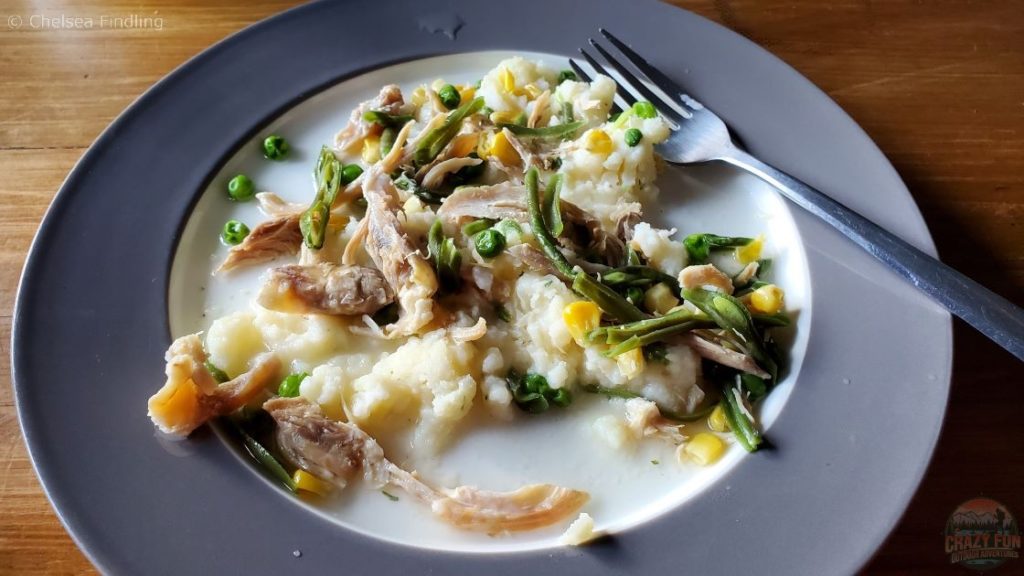
I boiled water for ten minutes and then transferred it into a pot to rehydrate the vegetables and chicken. The pot of boiling water rehydrated the food in half an hour. Rehydrating food takes much longer in lukewarm water.
I boiled the milk, added margarine and potato flakes and mixed it to create cooked potatoes. Within a few minutes, everything was ready to serve and eat. It was a filling, easy and delicious meal to eat after a seven-hour backpacking trip.
Night Sky
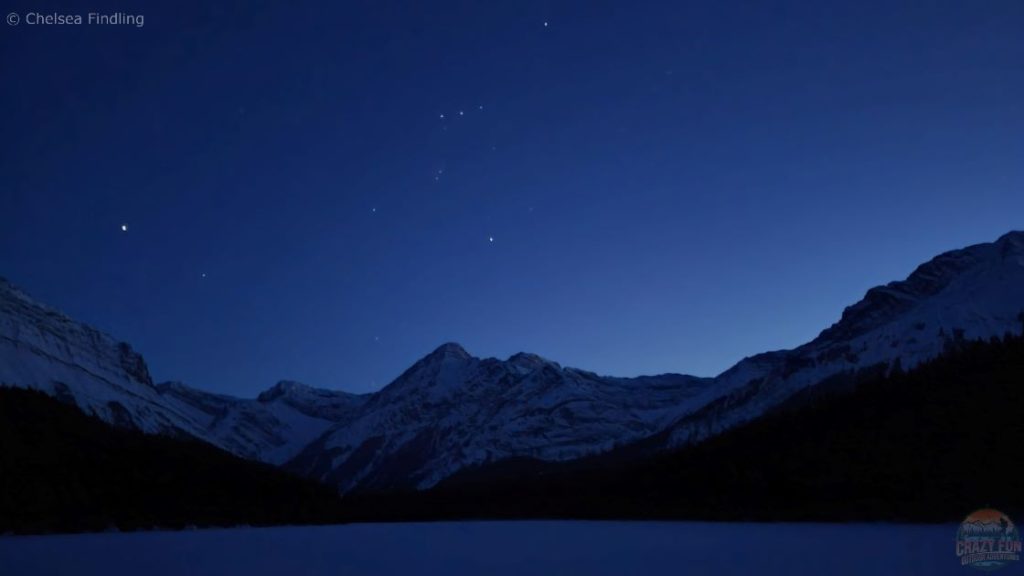
The stars lit up the night sky with no clouds in sight. We saw so many constellations since there was no pollution affecting our visibility. The big dipper could be seen just above the Jacques Lake cabin. It was a gorgeous view. We didn’t need our headlamps since the stars were so bright lighting up the scenic surroundings.
Jacques Lake
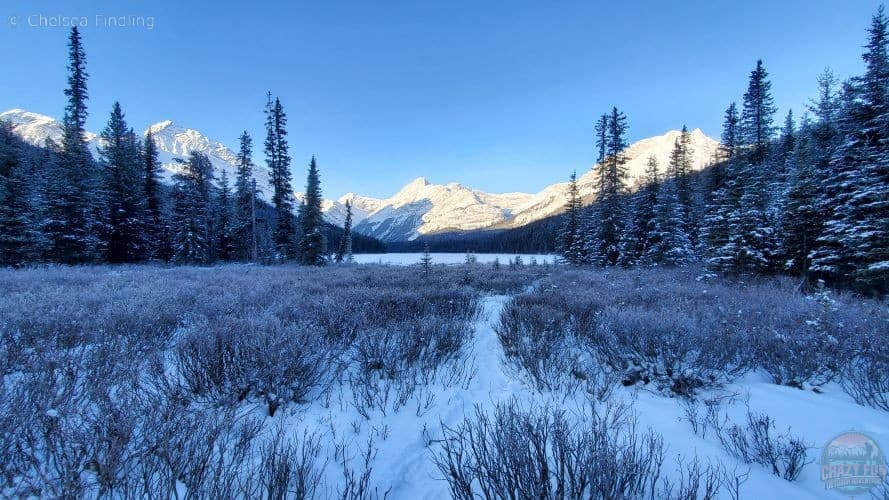
This was our view waking up to Jacques Lake the second day. The sun shining on the mountains was beautiful. It was a good way to start the day.
Outhouse Barrel Replacement
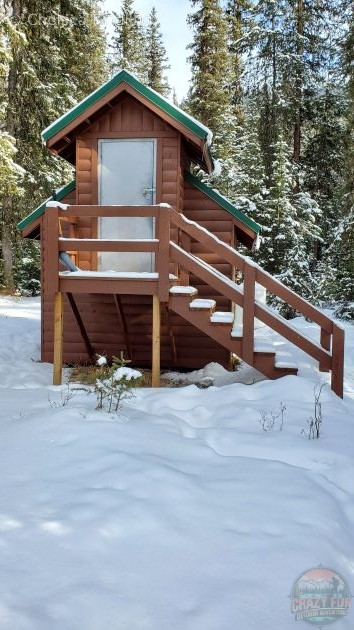
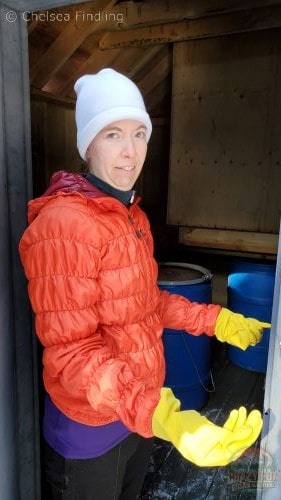
Unfortunately, the outhouse barrel was full and needed replacing later that morning. Although it’s not a fun chore, Kris and I took it upon ourselves to change it. When staying at Jacques Lake Hut and you find the barrel full, it’s the responsibility of the occupants who stay there to change it. Here is a video of the process.
Exploring
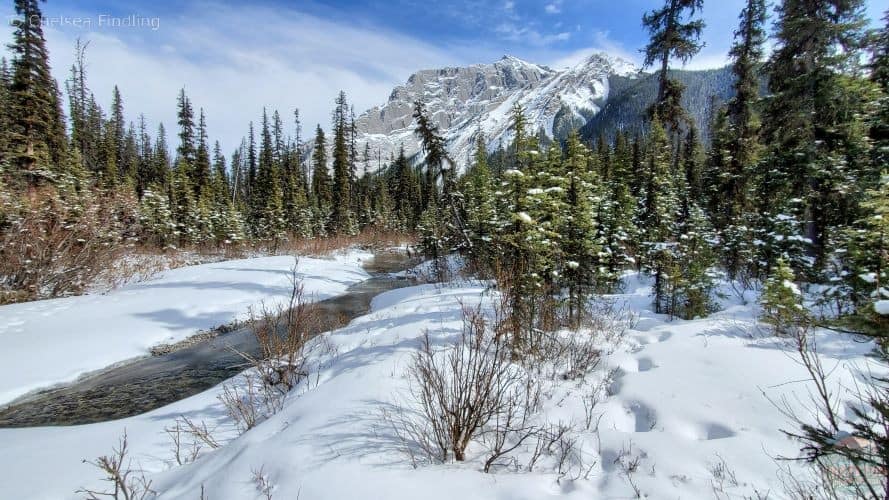
We went exploring past Jacques Lake Cabin unsure of what we would find. We didn’t think we’d be able to go very far but wanted to take the opportunity to explore on our day off from backpacking. Turns out, we made our way on the south boundary trail for about an hour. On the section of trail we went the conditions were good. Just passed where we turned around we found out that the trail is now impassable due to the 2003 wildfire and floods. The trail from Climax Creek to Jacques Lake has since been impacted with fallen trees, new growth and slumping. Find more information here.
The trek there and back was adventurous and fun to explore. It was nice to stretch our legs and discover a new area.
Campground
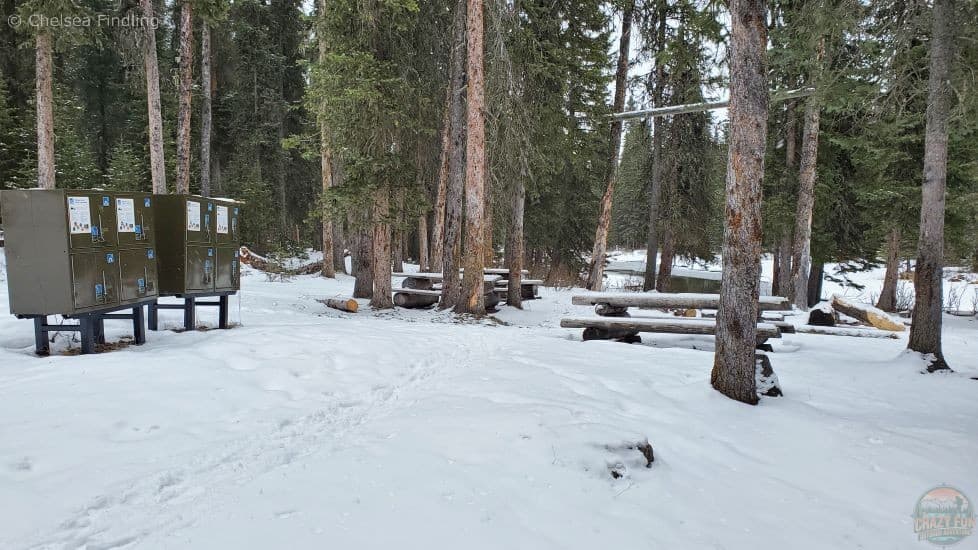
On our way backpacking to the hut, just before crossing the creek to Jacques Lake Hut, we came across the Jacques Lake Campground. This is where you can stay in the summer. There are bear-proof bins for your food, picnic tables and a fire pit (to be used when conditions permit and there aren’t fire bans in place). It looked like a beautiful campground. With the lake right beside it, it would be a spectacular place to go camping.
Final Thoughts
Jacques Lake Hut is a wonderful place to head out for a winter weekend or longer. It’s a gorgeous area to hike to the hut and explore once you have arrived. It’s an easy winter backpacking trip for beginners or those of you who would like to do an easy hike. The lakes you encounter along the way are stunning to admire and provide opportunities to take pictures. Kris, my parents and I had never been there before so it was pleasant to discover a new area. The hut is quaint making it a fun trip to do as a couple. I love spending time in huts. I always enjoy getting everything ready for a winter backpacking trip. It’s fun to dehydrate food, pack winter clothing and find all the gear needed. With this helpful Guide to Winter Backpacking Into Jacques Lake Hut, you’re all set to plan your next trip there!
Additional Links
- Backpacking Poboktan Trail Successfully
- Ultimate WCT Packing List
- West Coast Trail: Exciting Food
- City to Wilderness Hiking: Where to Start?
- Jasper Hikes: Best Memories
Trip Ressources
- Book your flights with Expedia
- Book your hotel with Booking.com or Hotels.com
- Book your vacation rental with Vrbo
- Book your experiences through TripAdvisor or Manawa
Pin It:

Leave a Reply